Admin Panel
The Tarot Admin Panel is split into functional sections with tabs. Each tab focuses on a specific Tarot function.
The Admin Panel includes the following sections: User Management, Database, Organisation Settings, Events & Actions, Delivery Management, Transport Management, Returns, Costing Management, Containers, Exports, and Account.
Info
Availability of Admin Panel sections depends on the user’s access level and the modules enabled for the organisation.
Some sections may be hidden if the required permissions are not granted or the corresponding module is disabled.
User Management

Roles
Use the Roles tab to control what users can see and do in Tarot. Roles define access levels and help you protect sensitive features.

To create or edit a role:
- Select the Organisation the role belongs to.
- Choose the required Access Levels.
- Save the role to make it available to users.

Organisations
Use the Organisations tab to create organisations, set operational limits, and enable Tarot modules.

When you create or edit an organisation, configure the following fields:
-
Name
The organisation name displayed in the Tarot dashboard. -
Parent Organisation (optional)
Use this to build an organisational hierarchy. -
Max Active Drivers
Limits how many drivers can operate at the same time. -
Timezone
Ensures schedules and timestamps match local operations. -
Modules
Enable or disable specific Tarot features. -
Logo
Upload a logo to brand the Tarot interface.

Users
Use the Users tab to manage individual user accounts in Tarot.
Each user belongs to one Organisation and has one assigned Role.

Adding a new user
When you create a user, provide the following details:
- Password
- First Name
- Last Name
- Organisation
- Role

Assign the correct role to ensure users only access the features they need.
Database
The Database section lets you manage the everyday data that Tarot uses to plan routes. Each tab contains a list of existing records. From there, you can edit, delete, or add new entries.
All Database tabs follow the same pattern: - a table showing existing items - a modal for creating or editing records
Scenarios
Use the Scenarios tab to manage routing scenarios.

The table shows all existing scenarios. Use the Actions+ button to add a new one.
Scenarios define the planning context used to group jobs and build runs.
Info
Scenarios are a core Tarot object.
See Scenarios in Core Objects for: - scenario structure and fields - how scenarios are used in planning - relationships with jobs and runs
From the Admin Panel, you can: - create scenarios for specific dates - edit scenario names and scheduling - assign scenarios to organisations
Jobs
Use the Jobs tab to manage delivery and pickup tasks.

The table shows all existing jobs.
Use filters and search to quickly locate specific entries.
Info
Jobs are a core Tarot object.
See Jobs in Core Objects for: - full job field definitions - relationships with units, returns, runs, and scenarios
From the Admin Panel, you can: - create and edit jobs - assign jobs to scenarios - update planning-related constraints
Drivers
Use the Drivers tab to manage driver profiles.

From the list, you can edit existing drivers or add new ones using Actions+.
Info
Drivers are a core Tarot object.
See Drivers in Core Objects for: - driver structure and constraints - how shifts and limits affect routing - driver usage in runs and optimisation
From the Admin Panel, you can: - create and edit driver profiles - configure shifts and breaks - assign dispatch and billing settings
Runs
Use the Runs tab to manage runs for drivers.

A run groups jobs for a single driver within a scenario and is used for route planning.
Info
Runs are a core Tarot object.
See Runs in Core Objects for: - run structure and relationships - how runs link drivers, jobs, and scenarios - planning and optimisation context
From the Admin Panel, you can: - create runs for drivers - assign scenarios - prepare routes for planning
Units
Use the Units tab to manage shipment items linked to jobs.

Each unit represents a single package or parcel and is always linked to a job.
Info
Units are a core Tarot object.
See Units in Core Objects for: - unit structure and fields - how units relate to jobs, containers, and proofs
Locations
Use the Locations tab to manage addresses used across Tarot.
Locations are shared between Jobs, Runs, and other entities to ensure consistent and accurate route planning.
Each location includes: - a full Address - Latitude and Longitude

Adding a location
Add a location to make an address available for jobs and routing.
To add a location:
- Click Actions+.
- Start typing an Address.
- Select the correct address.
- Click Save.

Tarot automatically resolves coordinates to ensure accurate distance and travel-time calculations.
Clients
Use the Clients tab to manage delivery and pickup recipients.
Clients represent customer locations where deliveries or pickups take place and are typically referenced by Jobs.

From the list, you can edit existing clients or add new ones using Actions+.

Import
Clients can be imported using CSV or Excel files.

When a file is uploaded: - Tarot detects columns and data types - A preview table is shown - No data is saved until you confirm the import

Export
Client data can be exported at any time in CSV or Excel format.
Manual creation
Clients can also be added manually using the Add Client form.
Organisation Settings
The Organisation Settings section lets you control how your organisation works in Tarot.
Here you define how routes are optimised, how drivers receive jobs, and how planning behaves overall.
These settings apply to the entire organisation.
Optimisation Settings
Use the Optimisation Settings tab to control how Tarot builds routes.
This is where you decide what the routing engine should prioritise and how jobs are distributed.
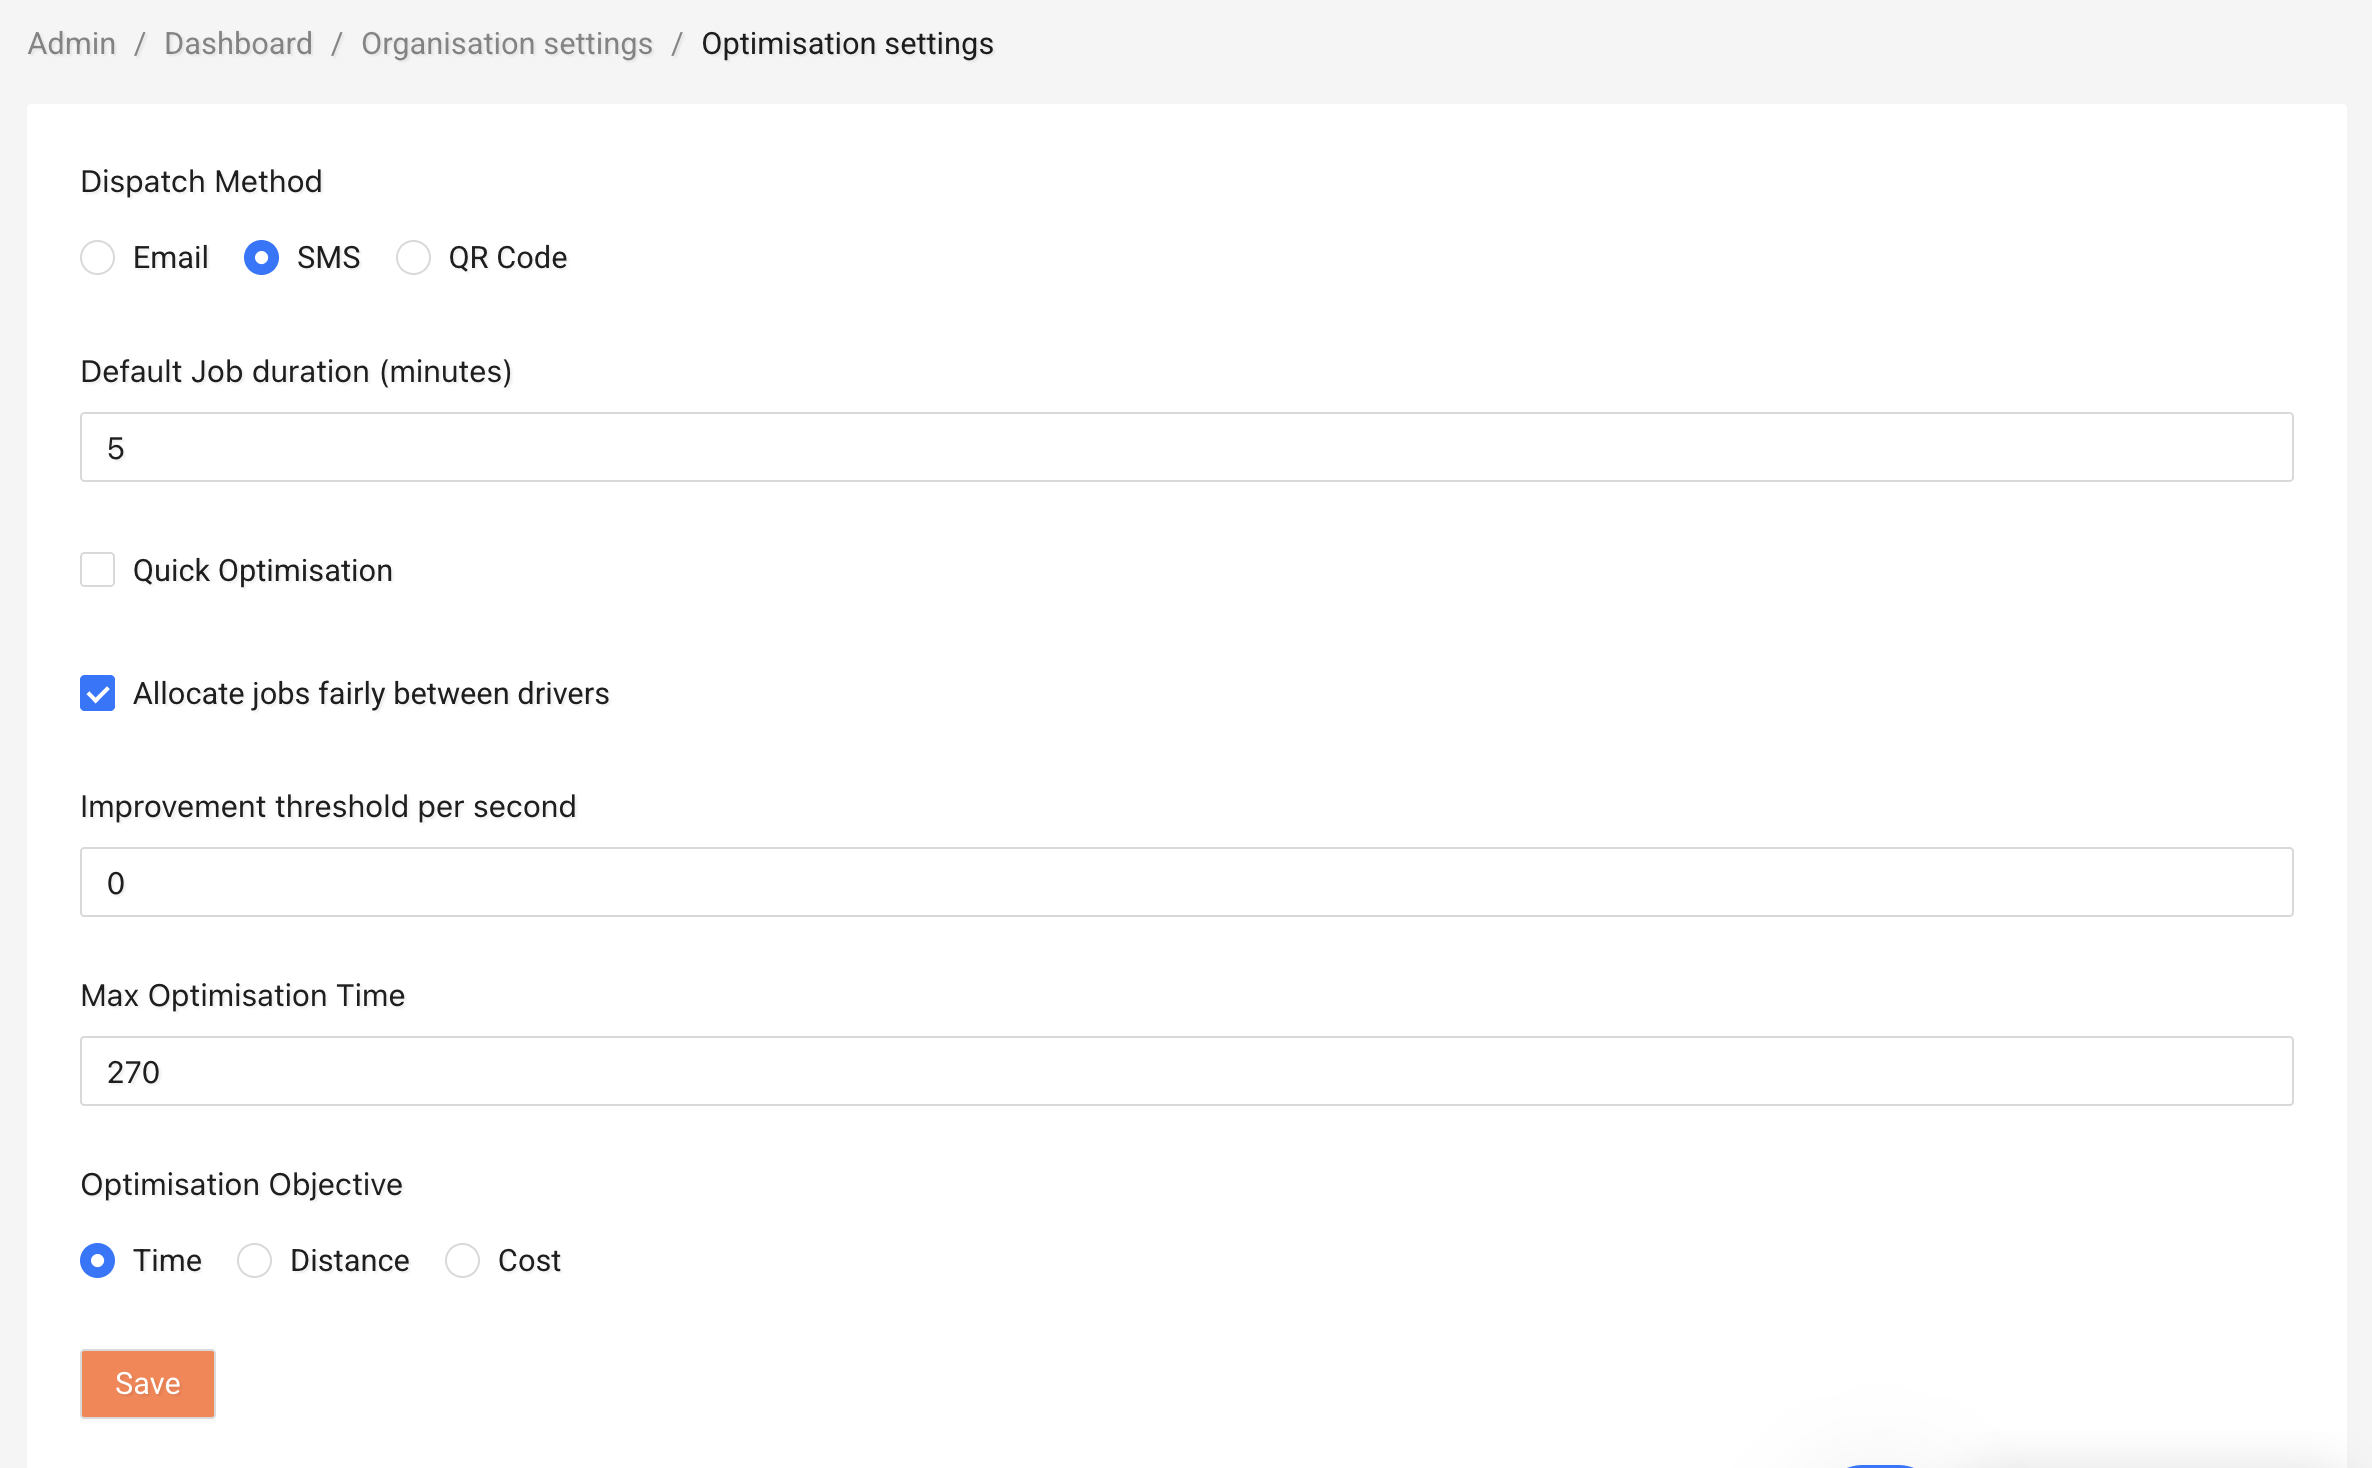
Dispatch Method
Choose how drivers receive their jobs:
- Email – Drivers get job details by email.
- QR Code – Drivers scan a QR code to access their jobs.
Pick the option that fits your daily workflow.
Default Job Duration (minutes)
Set the default time a driver is expected to spend at each job.
Accurate job duration helps Tarot calculate realistic arrival times and schedules.
Quick Optimisation
Turn this on if you want routes to be generated faster.
This is helpful when: - you need results quickly - routes are simple - you're testing different scenarios
Note
Quick Optimisation focuses on speed.
For complex routing, you may get better results with it turned off.
Allocate Jobs Fairly Between Drivers
Enable this option to distribute jobs more evenly between drivers.
This helps: - balance workloads - avoid overloading a single driver - improve team fairness
Optimisation Objective
Choose what Tarot should prioritise when building routes:
- Time – Reduce total travel time.
- Distance – Reduce total distance driven.
- Cost – Reduce operational cost (if cost settings are configured).
Select the objective that matches your business priority.
Example
- Choose Time for urgent or same-day deliveries.
- Choose Distance to reduce fuel usage.
- Choose Cost if managing driver or vehicle costs is critical.
After making changes, click Save to apply them.
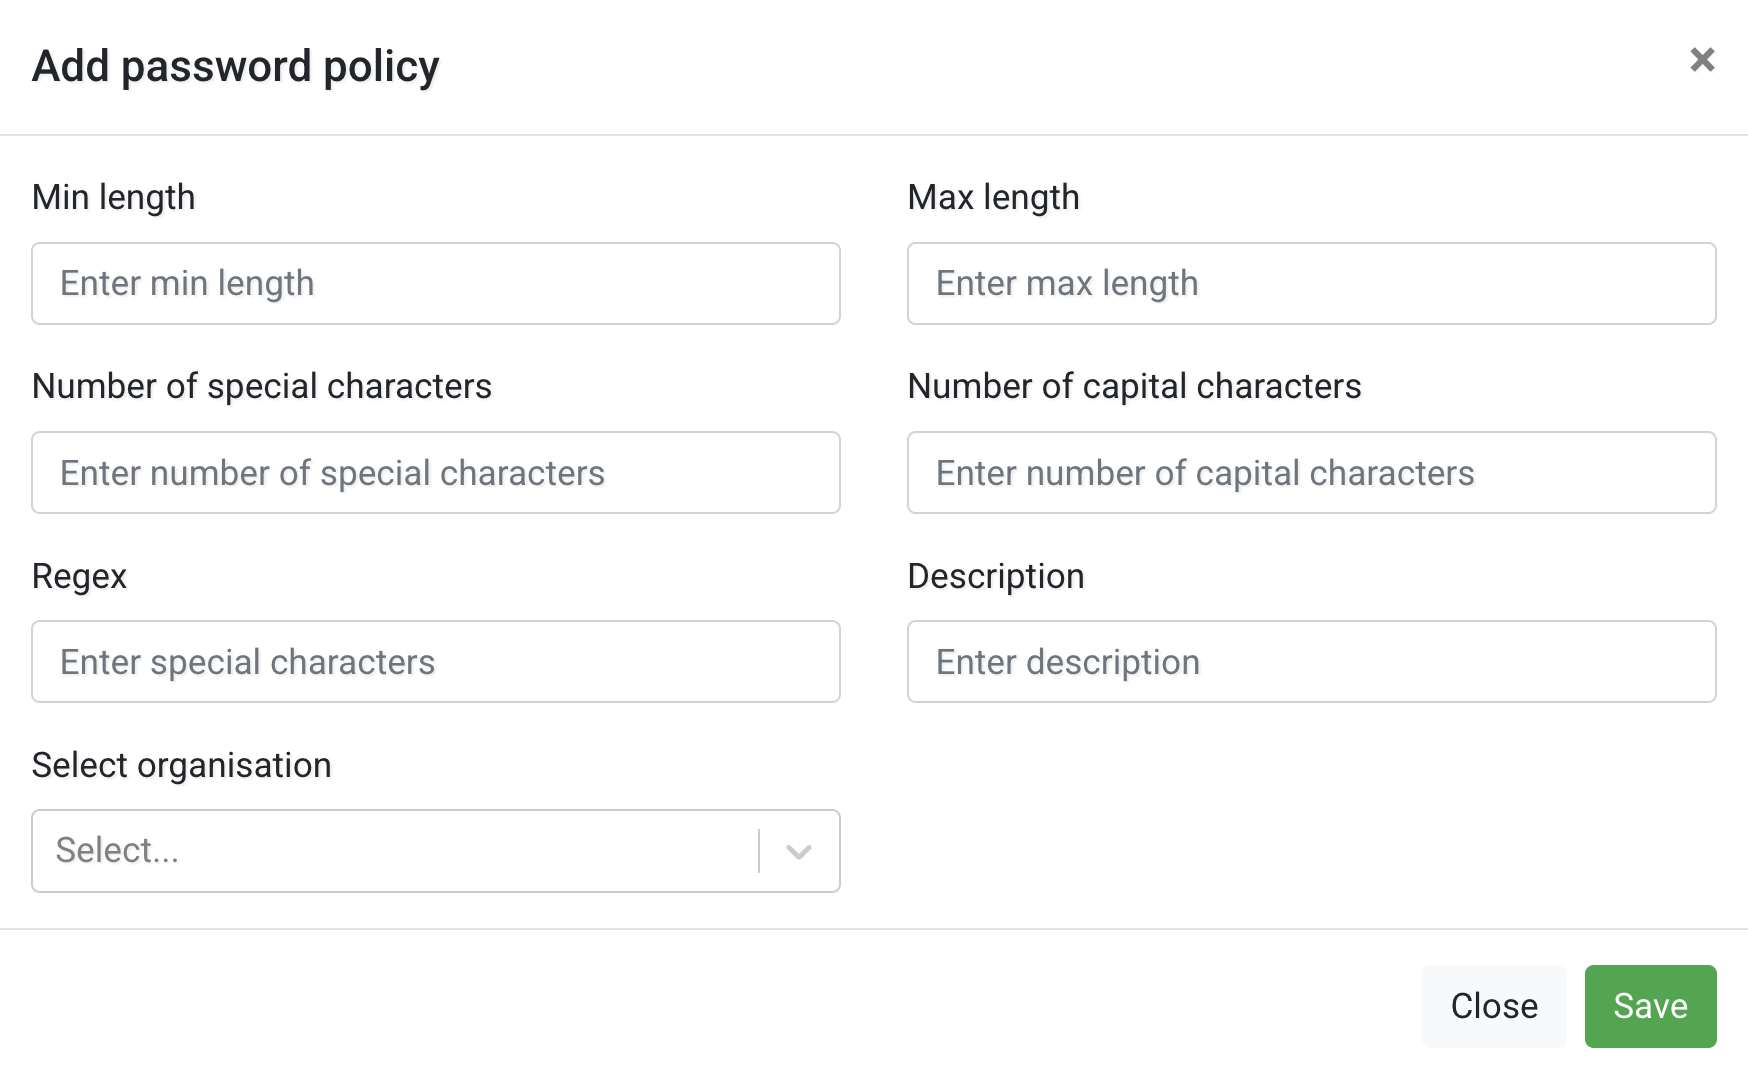
Password Policy
Use the Password Policy tab to define password requirements for your organisation.
This helps improve account security and ensures all users follow consistent password standards.
The table shows existing password policies, including:
- Min length – Minimum number of characters required.
- Max length – Maximum allowed password length.
- Special characters – Required number of special characters (e.g. !, @, #).
- Capital characters – Required number of uppercase letters.
- Description – Optional explanation of the rule.
You can edit an existing policy or create a new one using Actions+.
Units and Measurement
Use the Units and Measurement tab to define which measurement units your organisation uses in Tarot.
These settings affect how distances, weights, and fuel consumption are displayed across the platform.
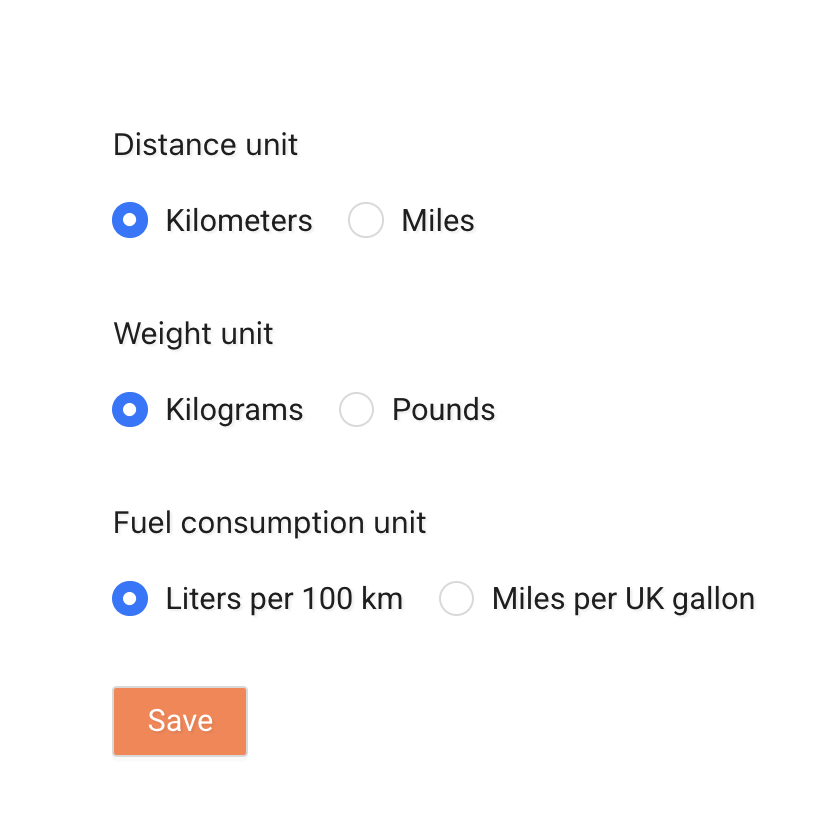
Distance Unit
Choose how distance is measured:
- Kilometers
- Miles
Weight Unit
Choose how weight is displayed:
- Kilograms
- Pounds
Fuel Consumption Unit
Select how fuel consumption is calculated and displayed:
- Liters per 100 km
- Miles per UK gallon
After making changes, click Save to apply them.
Note
Make sure your selected units match your operational and reporting standards.
App Settings
Use the App Settings tab to configure how the Tarot mobile app behaves for drivers.
These settings control GPS tracking, barcode logic, communication options, and helpdesk details.
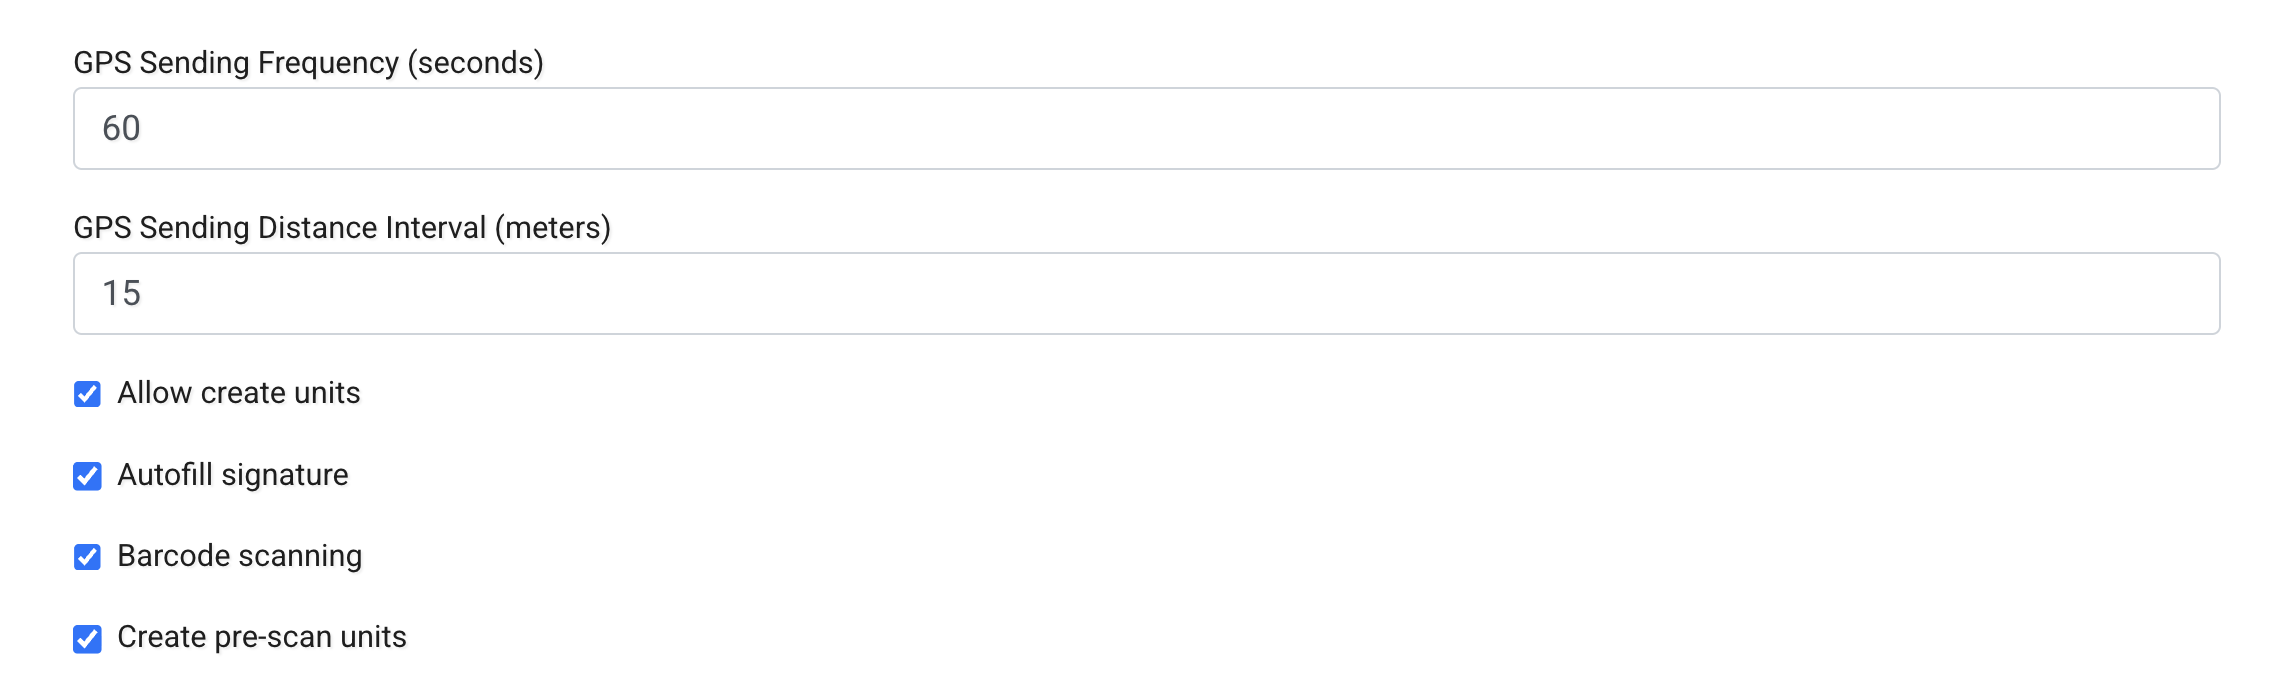
GPS Sending Frequency (seconds)
Defines how often the driver’s device sends GPS location updates.
Lower values: - provide more frequent tracking updates - increase battery and data usage
Higher values: - reduce battery usage - provide less frequent location updates
GPS Sending Distance Interval (meters)
Defines how far a driver must move before a new GPS update is sent.
This works together with the time-based GPS frequency setting.
Allow Create Units
If enabled, drivers can manually create units in the mobile app.
This is useful when: - shipments are added last minute - units are missing from the original job setup
Autofill Signature
Automatically fills the signature when completing a job.
This speeds up job completion in workflows where a physical signature is not required.
Barcode Scanning
Enable this to allow barcode scanning in the mobile app.
If disabled, drivers can manually mark units as loaded and then delivered without scanning barcodes.
This is useful if your workflow does not rely on barcode-based unit handling.
Create Pre-scan Units
Allows drivers to create units before scanning them.
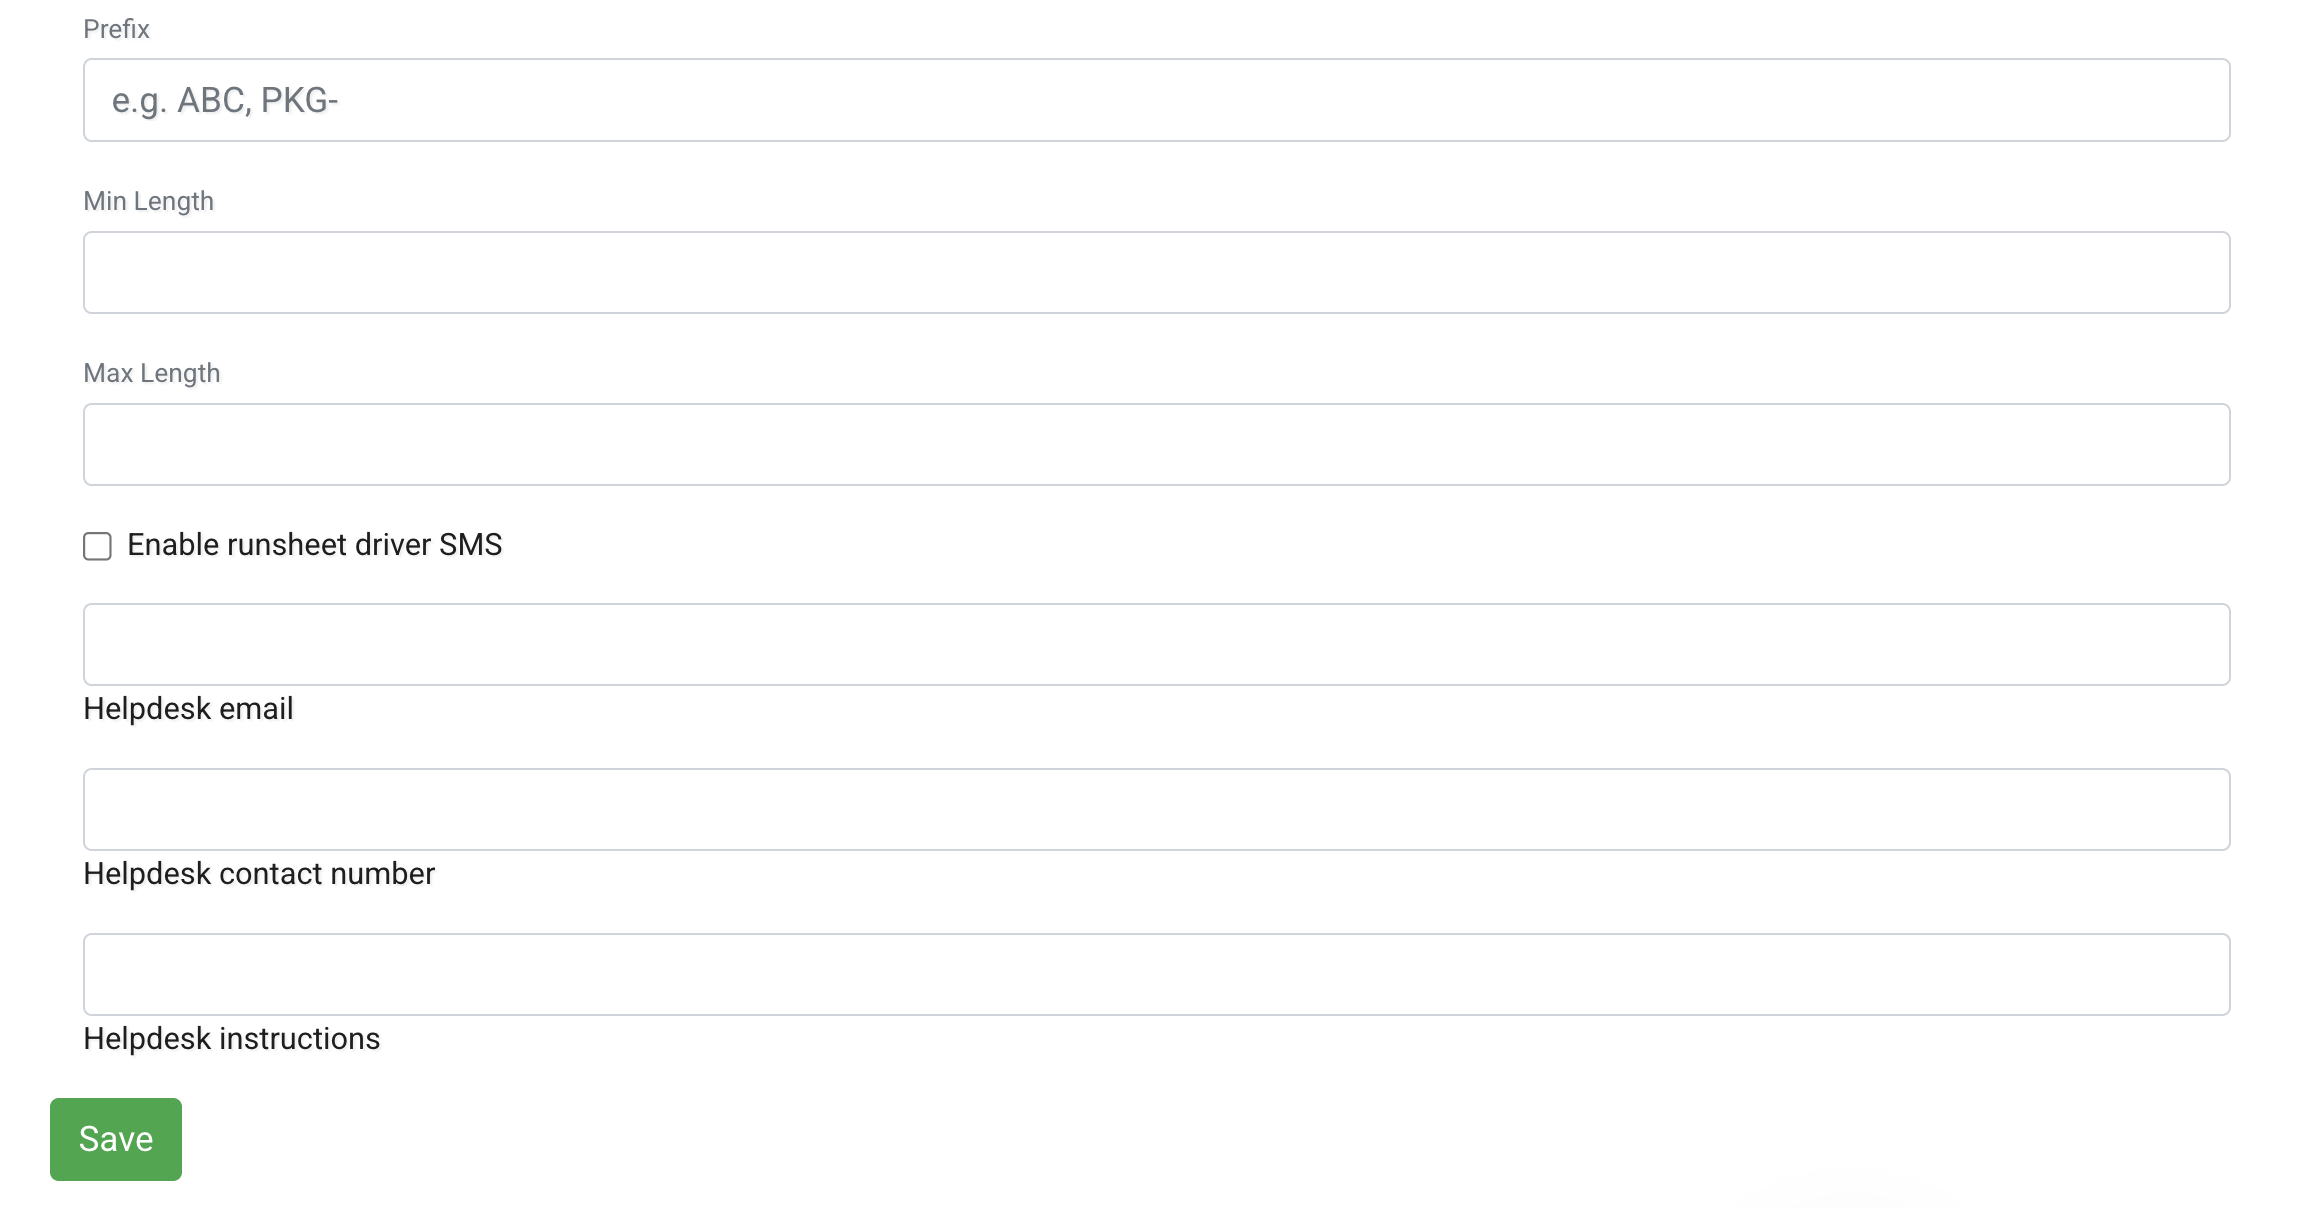
Unit Scan Pattern
The Unit Scan Pattern defines which barcodes are considered valid when scanning units in the mobile app.
Only barcodes that match the configured rule will be accepted.
Configure:
- Prefix – Required starting characters (e.g.
ABC,PKG-). - Min Length – Minimum total barcode length.
- Max Length – Maximum allowed barcode length.
Tarot automatically generates a validation rule (regex) based on these values.
If you need to match multiple patterns or apply more complex validation rules, select Advanced (Regex) to create your own custom validation rule.
You can learn more about regular expressions here.
If you're not familiar with regex, you can describe your barcode format to an AI assistant (such as ChatGPT or Gemini) and ask it to generate the appropriate pattern for you.
Enable Runsheet Driver SMS
When enabled, drivers receive their runsheet via SMS.
This option requires SMS to be configured in Tarot.
See SMS Configuration for more details.
Helpdesk Email
The email address displayed in the app for driver support.
Helpdesk Contact Number
The phone number drivers can call for assistance.
Helpdesk Instructions
Additional instructions shown in the mobile app.
Use this field to provide: - support guidance - escalation instructions - operational notes
After making changes, click Save to apply them.
Note
Changes to App Settings affect all drivers in the organisation. Make sure updates are aligned with your operational workflow.
Proof Reasons
Use the Proof Reasons tab to define delivery outcome reasons used in the mobile app.
Proof reasons allow drivers to explain what happened during a job - for example, successful delivery, damaged goods, missing items, or client-related issues.

The table shows all configured reasons and their behaviour flags.
From here, you can: - create a new reason - edit existing ones - import reasons in bulk - export reasons as CSV or Excel
Adding a Proof Reason
Click Actions+ to create a new reason.
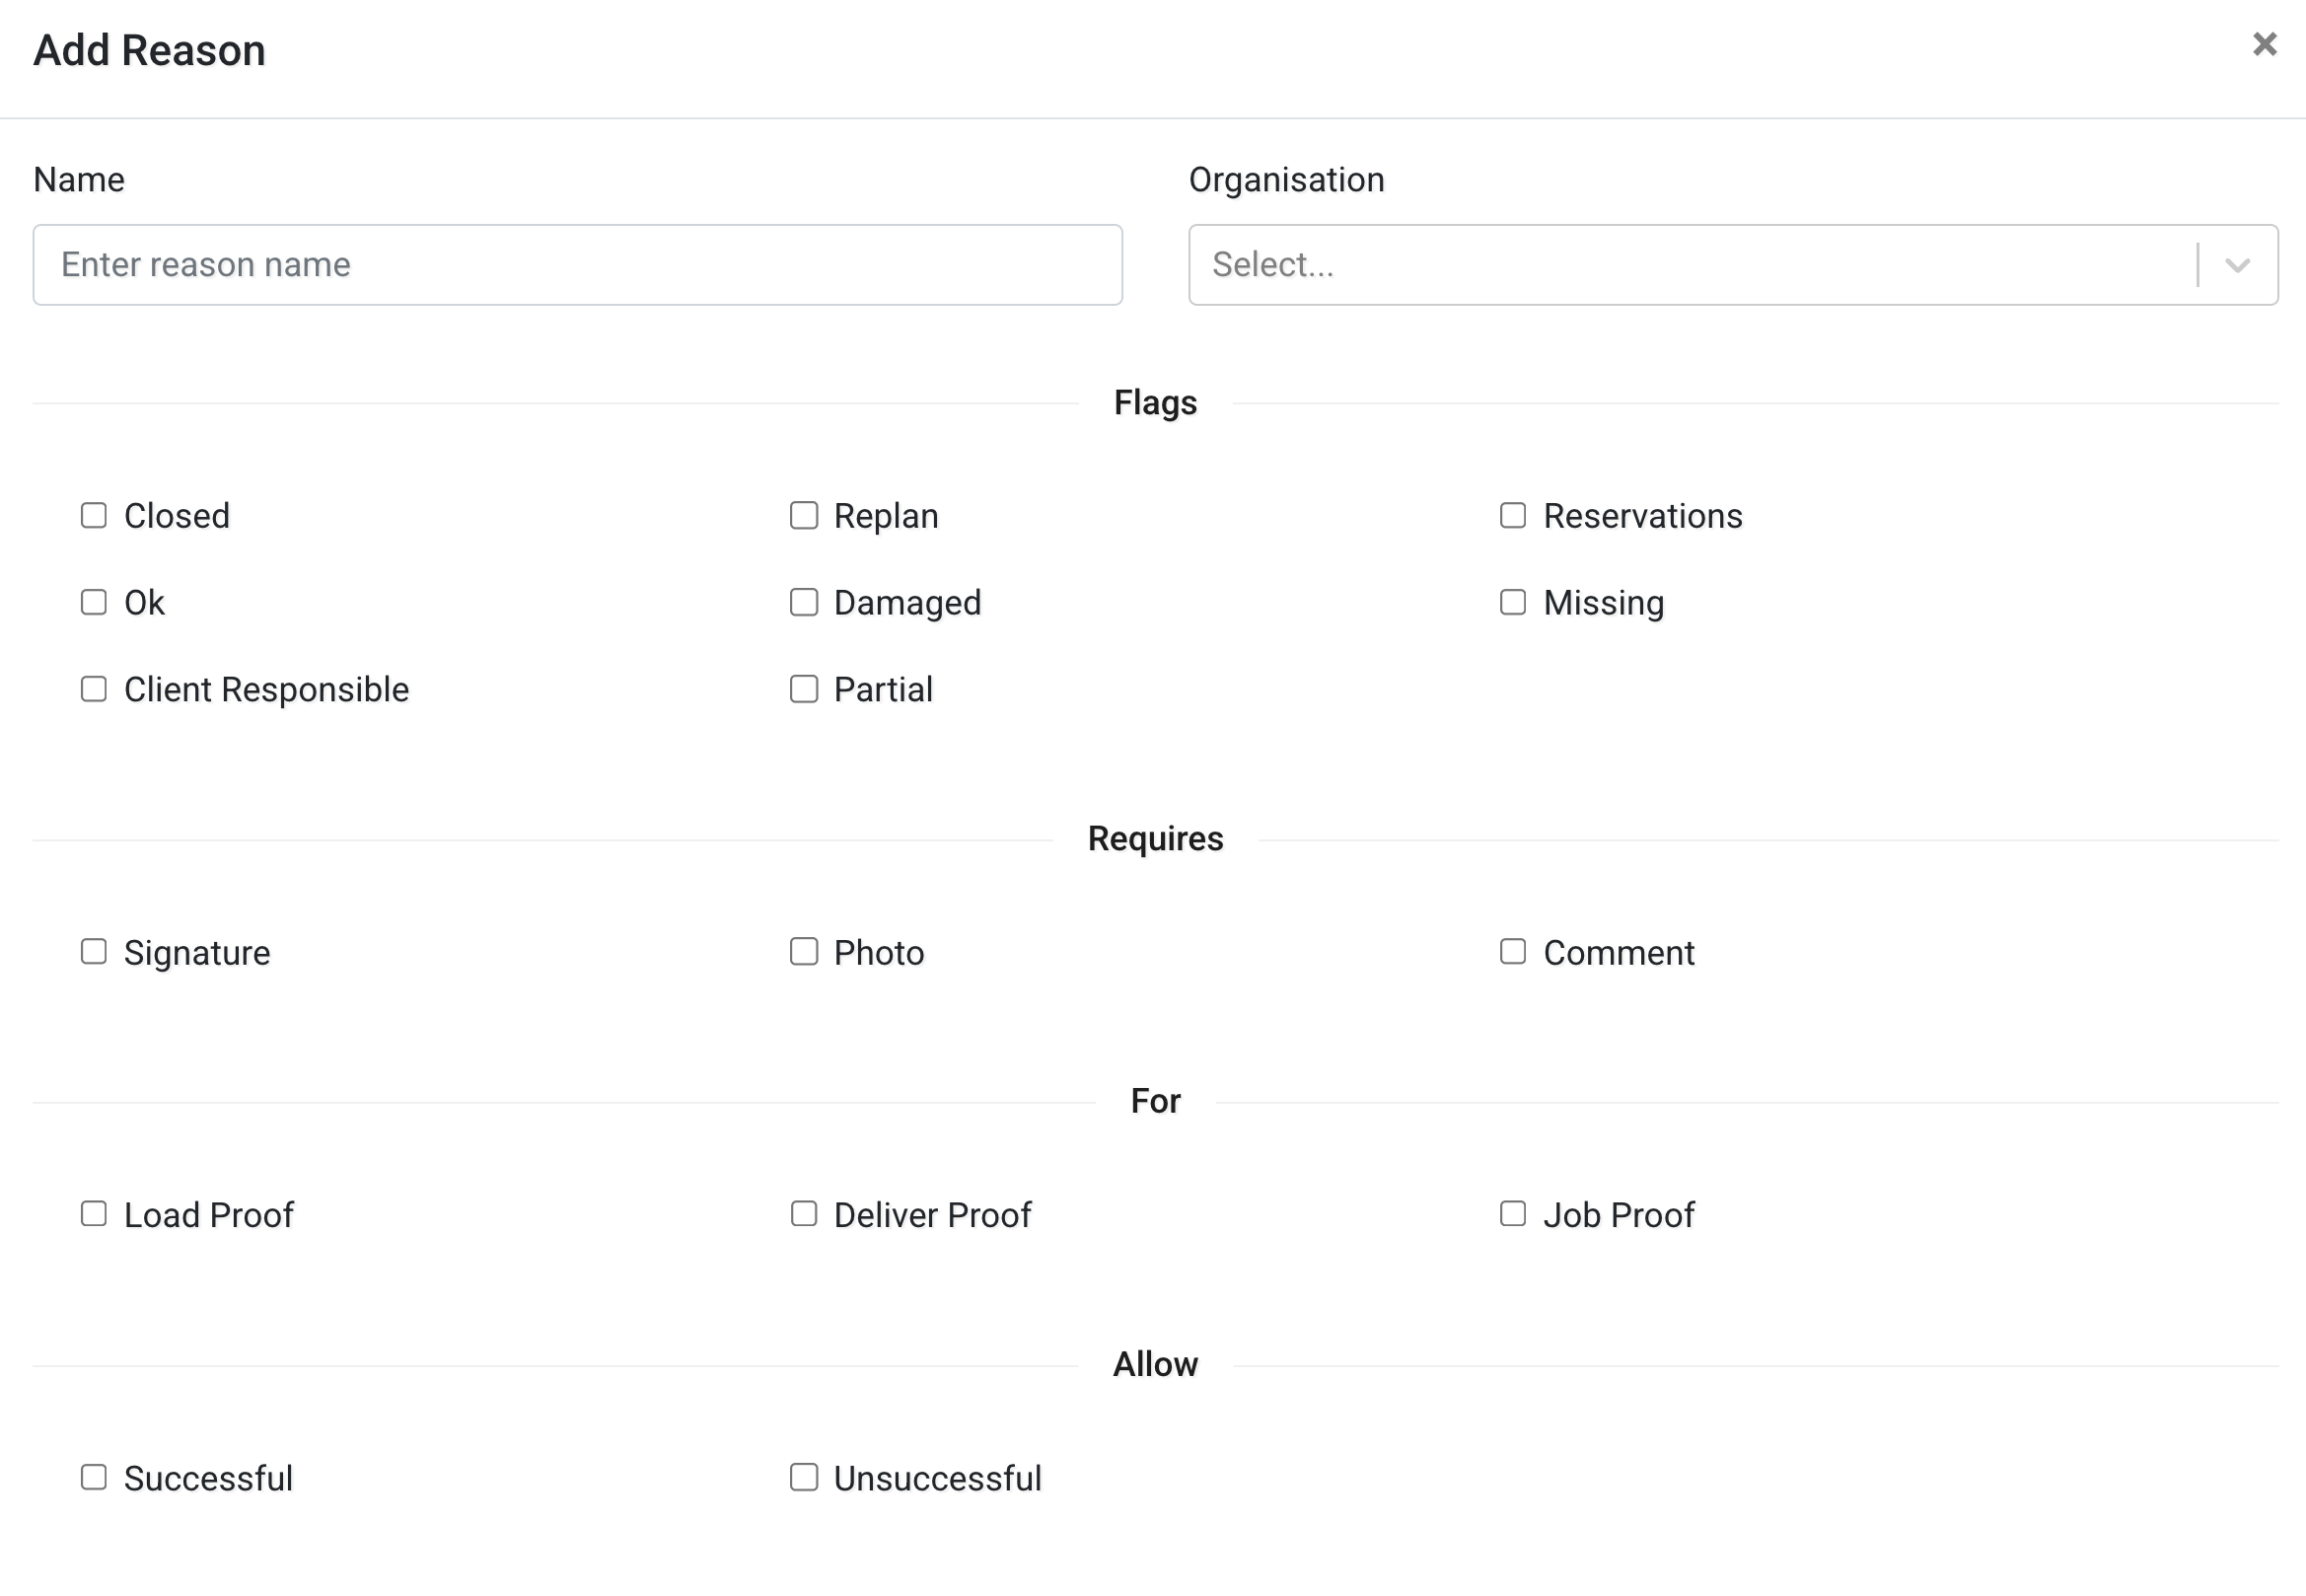
Configure the following fields:
Basic Information
- Name – The label shown to drivers in the app.
- Organisation – The organisation this reason belongs to.
Flags
Flags define how the reason behaves in the system.
- Closed – Marks the job as completed.
- Ok – Indicates a successful outcome.
- Damaged – Indicates damaged goods.
- Missing – Indicates missing items.
- Client Responsible – Indicates responsibility lies with the client.
- Replan – Marks the job as requiring replanning.
- Reservations – Marks the job with a reservation status.
- Partial – Indicates partial completion.
Requires
Define what the driver must provide when selecting this reason:
- Signature
- Photo
- Comment
This ensures the correct proof is collected.
For
Define when this reason is available:
- Load Proof
- Deliver Proof
- Job Proof
Allow
Define the outcome type:
- Successful
- Unsuccessful
TMS Codes
Use TMS Codes+ to link this reason with external Transport Management System codes.
This is useful when integrating Tarot with external systems.
After configuring the reason, click Save.
Importing Proof Reasons
Proof reasons can be imported in bulk using a file.
Click Import to upload a CSV or Excel file.
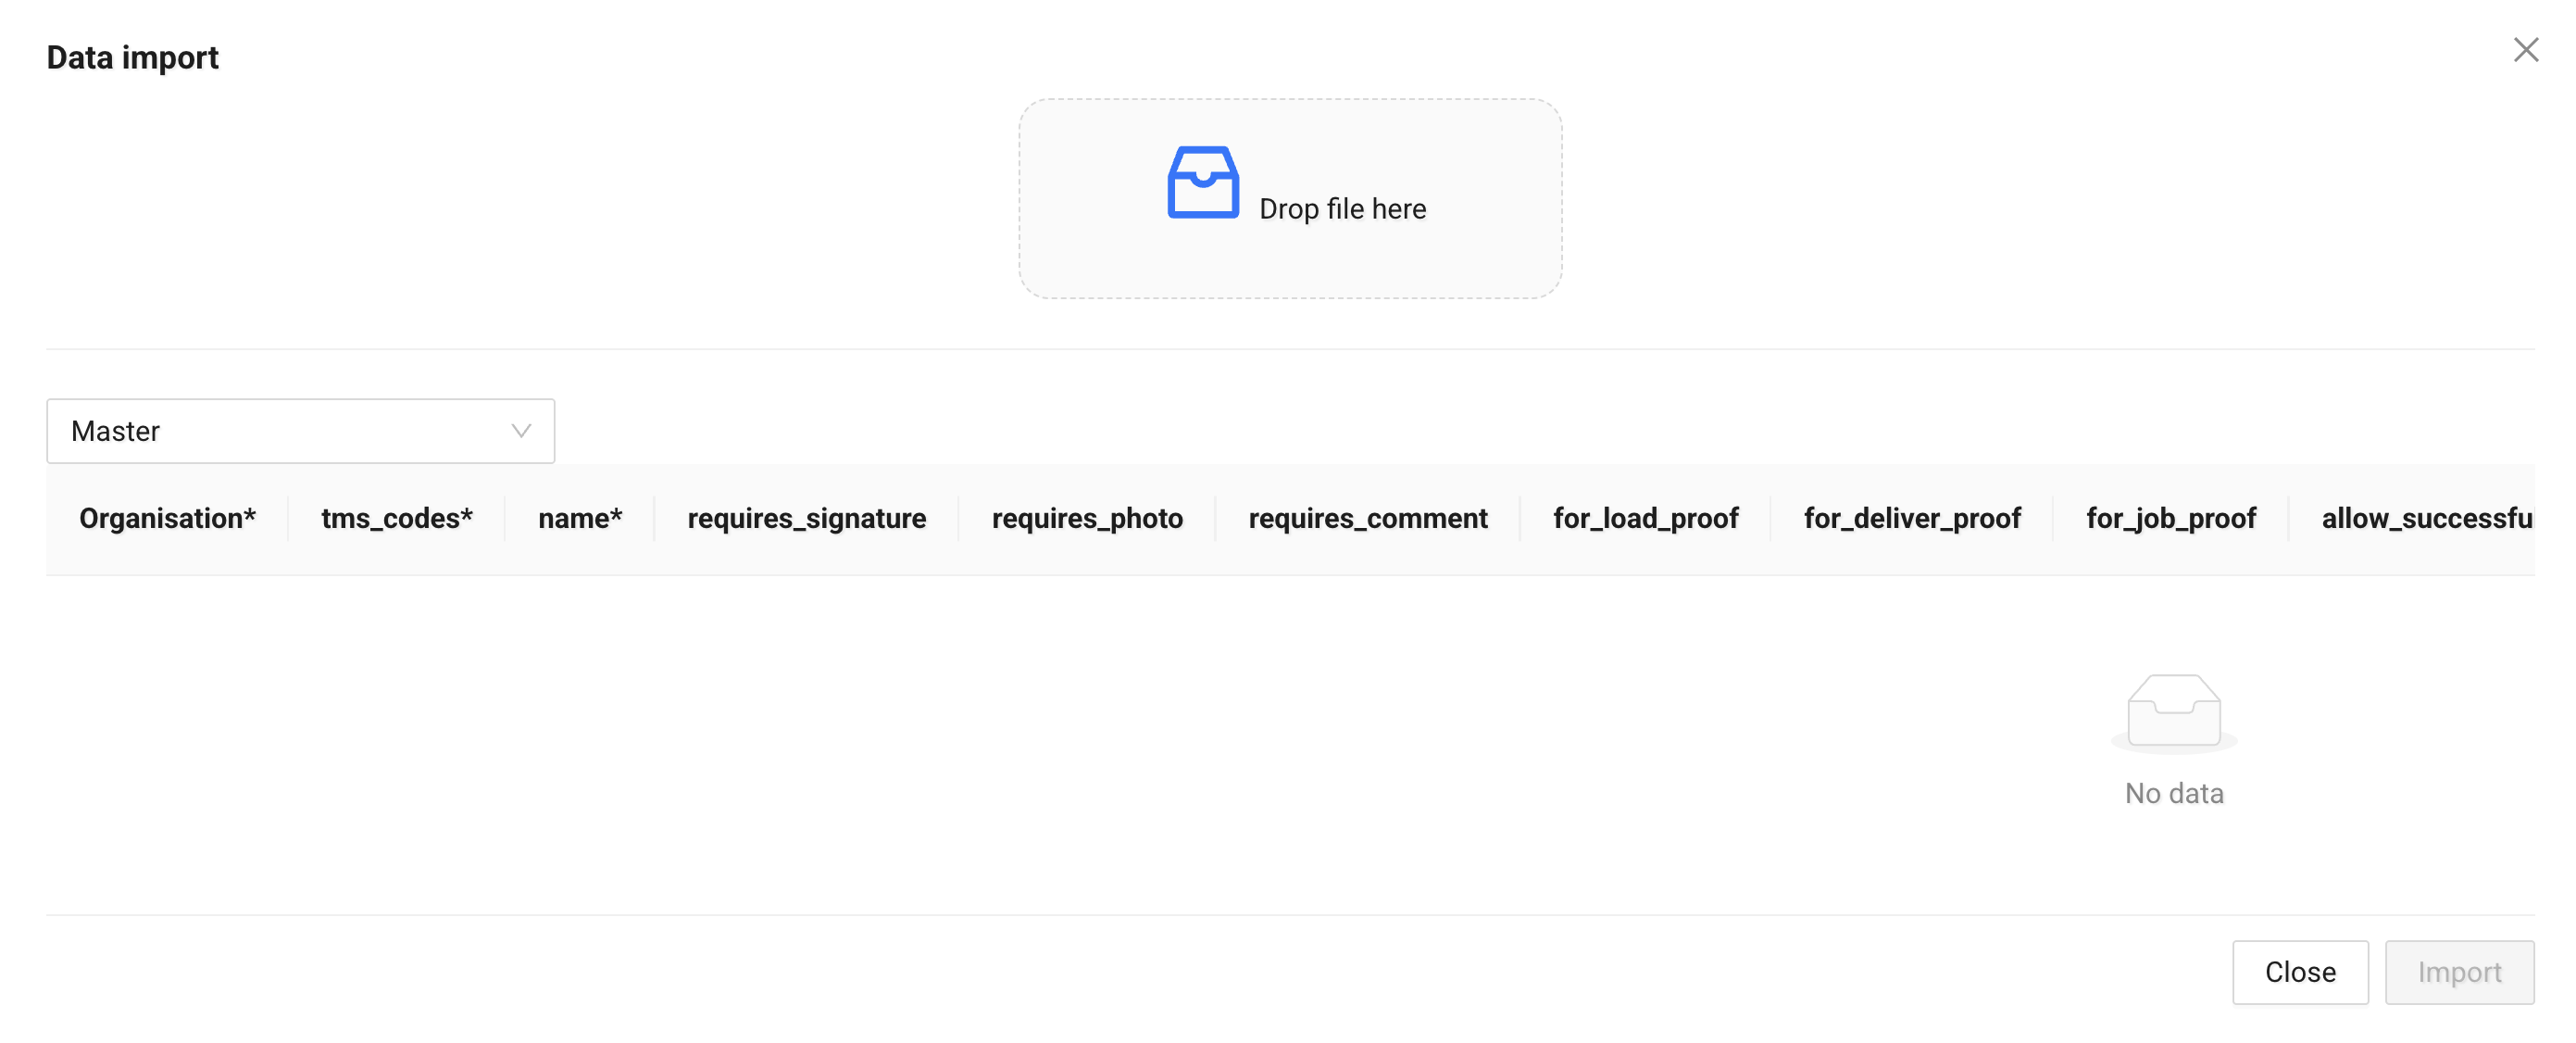
The import template includes fields such as:
organisation*tms_codes*name*requires_signaturerequires_photorequires_commentfor_load_prooffor_deliver_prooffor_job_proofallow_successfulallow_unsuccessful
Fields marked with * are required.
No data is saved until you confirm the import.
Exporting Proof Reasons
Click Export to download existing proof reasons as:
- CSV
- Excel
This is useful for: - backup - bulk editing - system integration
Proof Settings
Use the Proof Settings tab to define which proof reasons are used by default in a scenario.
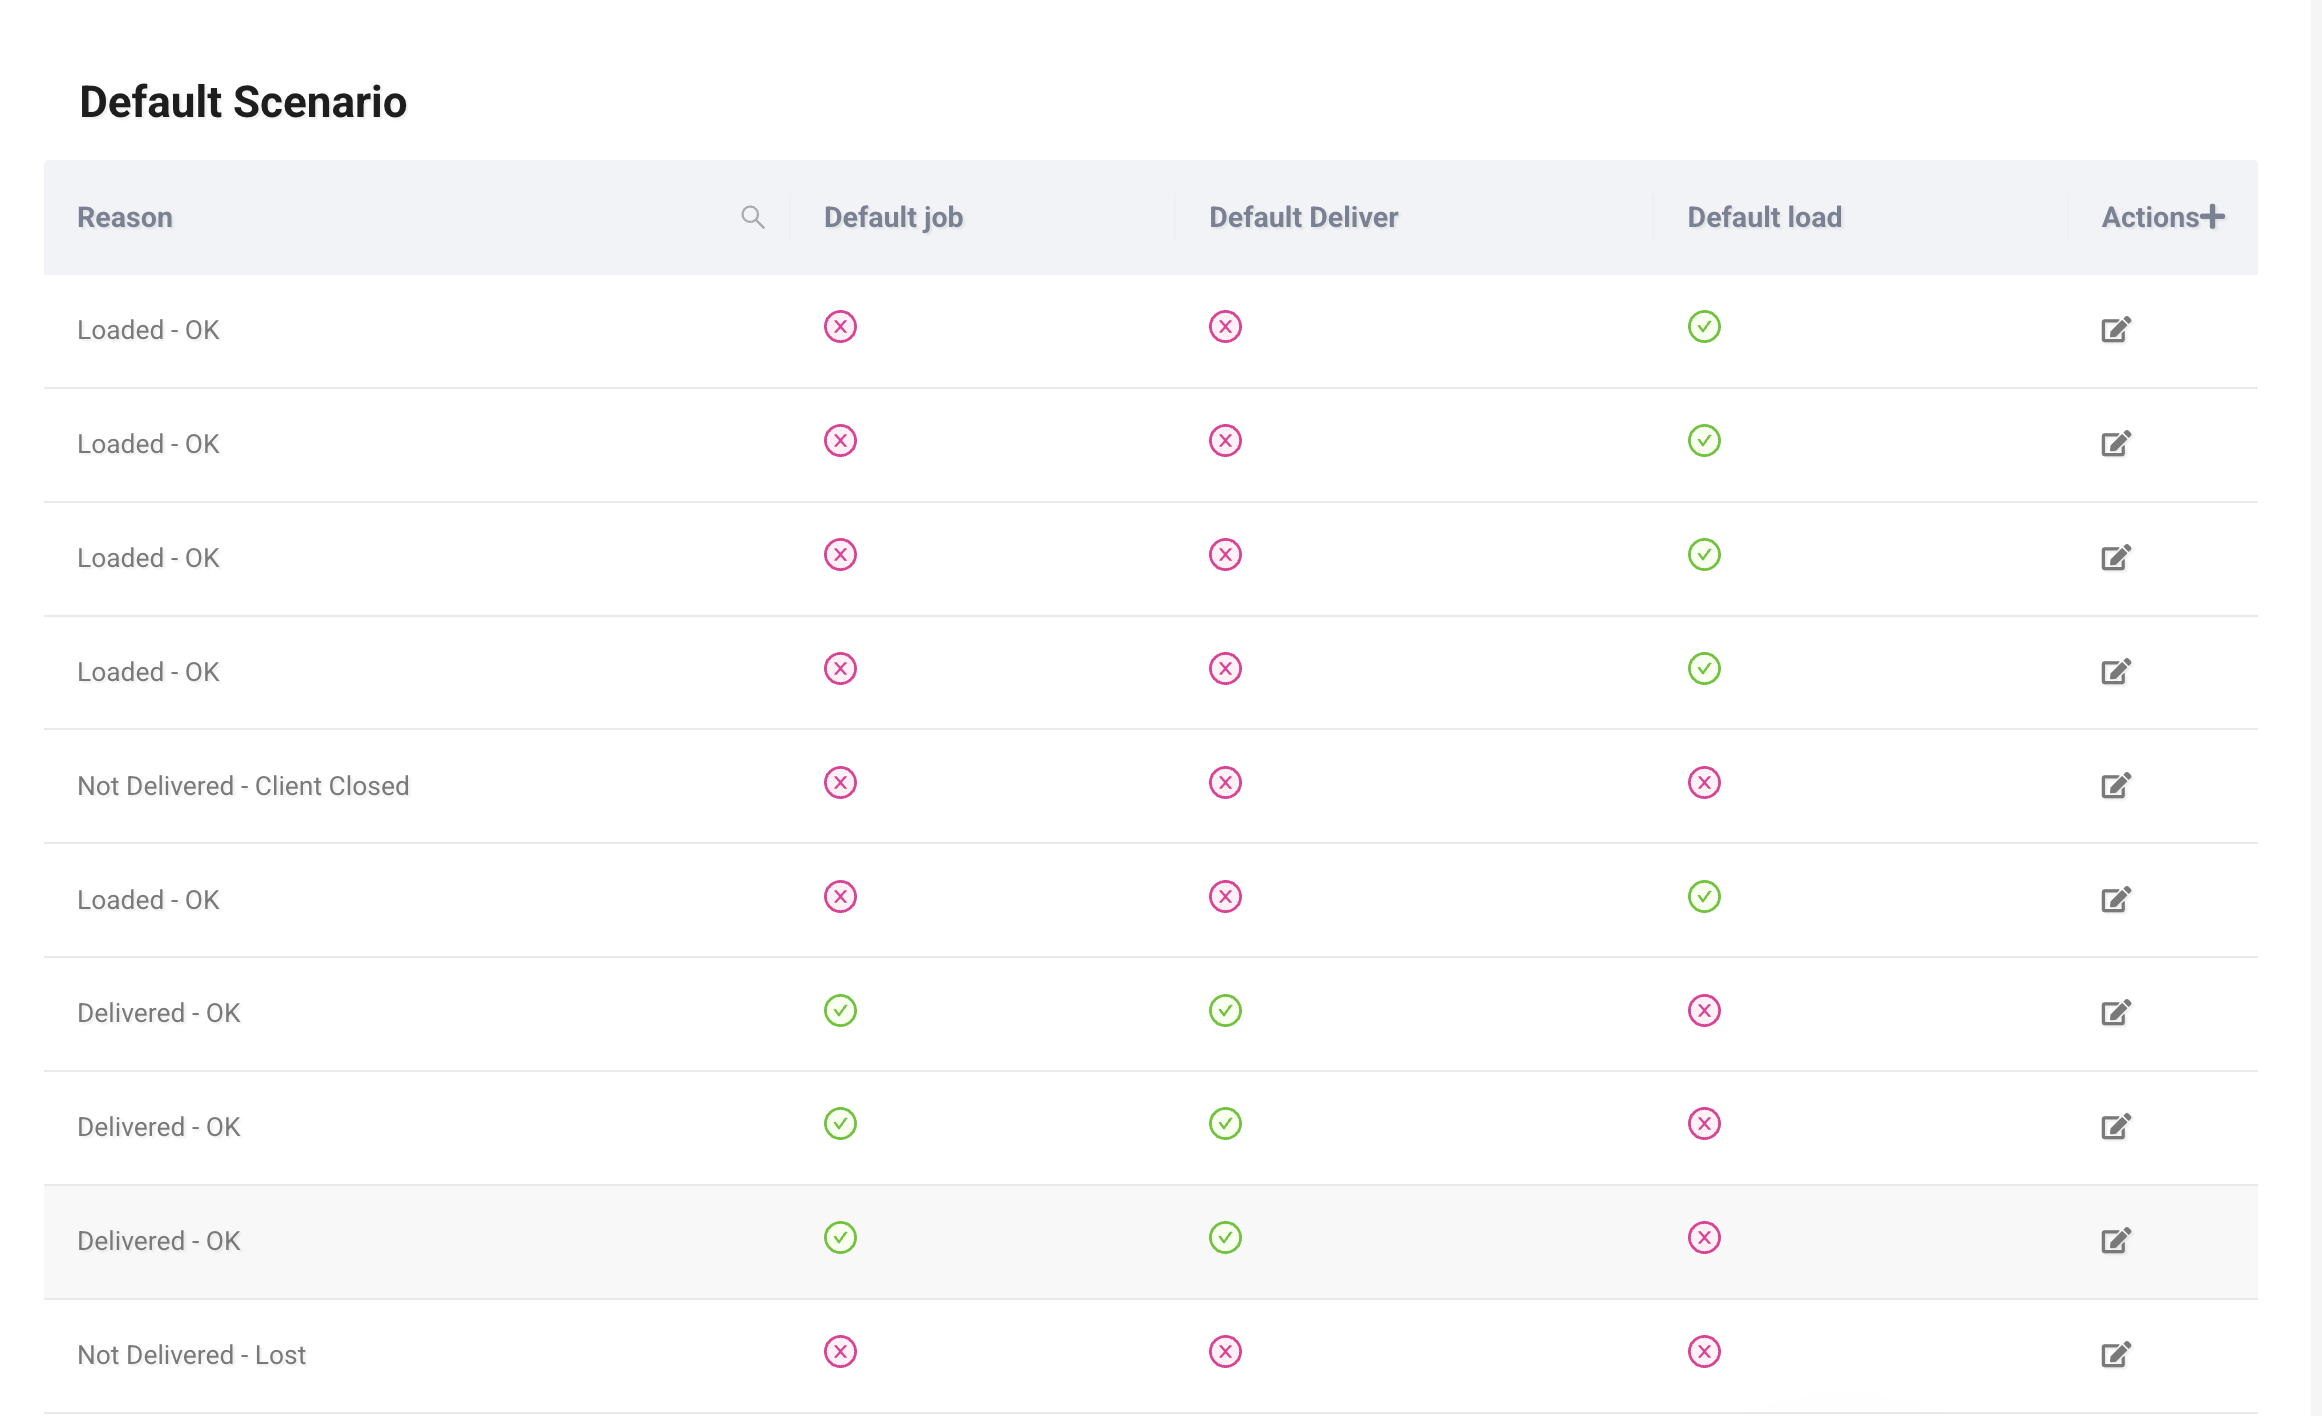
The table shows:
- Reason – The proof reason.
- Default job – Whether this reason is the default for job proof.
- Default deliver – Whether this reason is the default for delivery proof.
- Default load – Whether this reason is the default for load proof.
You can edit existing mappings.
Adding a Scenario Reason
Click Actions+ to assign a reason to a scenario.
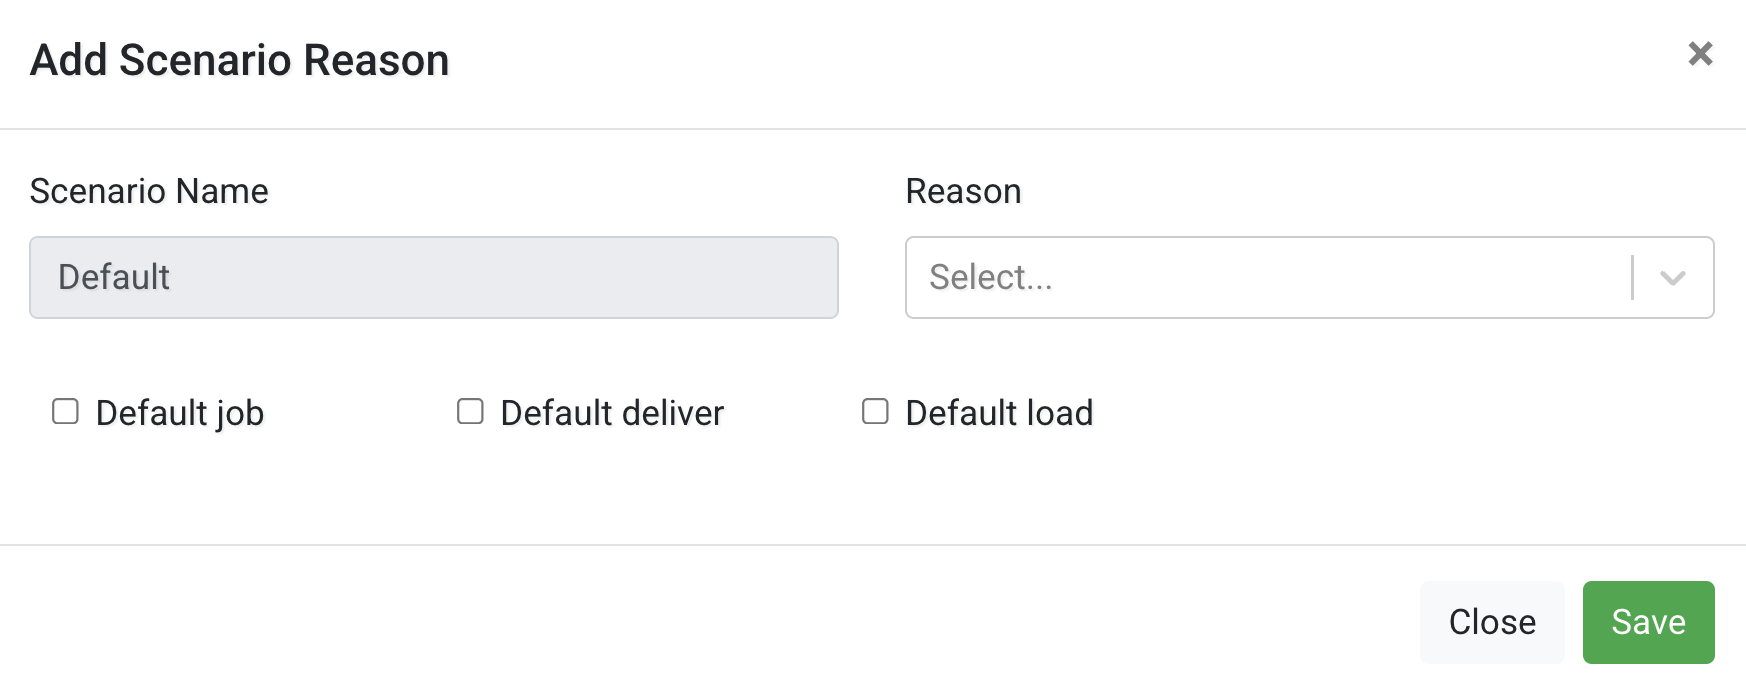
Configure the following:
- Scenario Name – The scenario this configuration applies to.
- Reason – Select one of the configured proof reasons.
Then choose where it should be used as default:
- Default job
- Default deliver
- Default load
After making changes, click Save.
Job Tags
Use the Job Tags tab to create and manage tags that can be assigned to jobs.
Job tags help you visually categorise and filter jobs in Tarot.
You can see them in the Job Pool, Jobs Panel, Runs Panel, and Tracking Panel, making it easier to identify and manage specific groups of jobs.
Tags are often used to mark jobs such as “Carry Over”, “Oversize”, delayed jobs, or any other category that requires special handling, routing, or assignment to a specific scenario or vehicle.
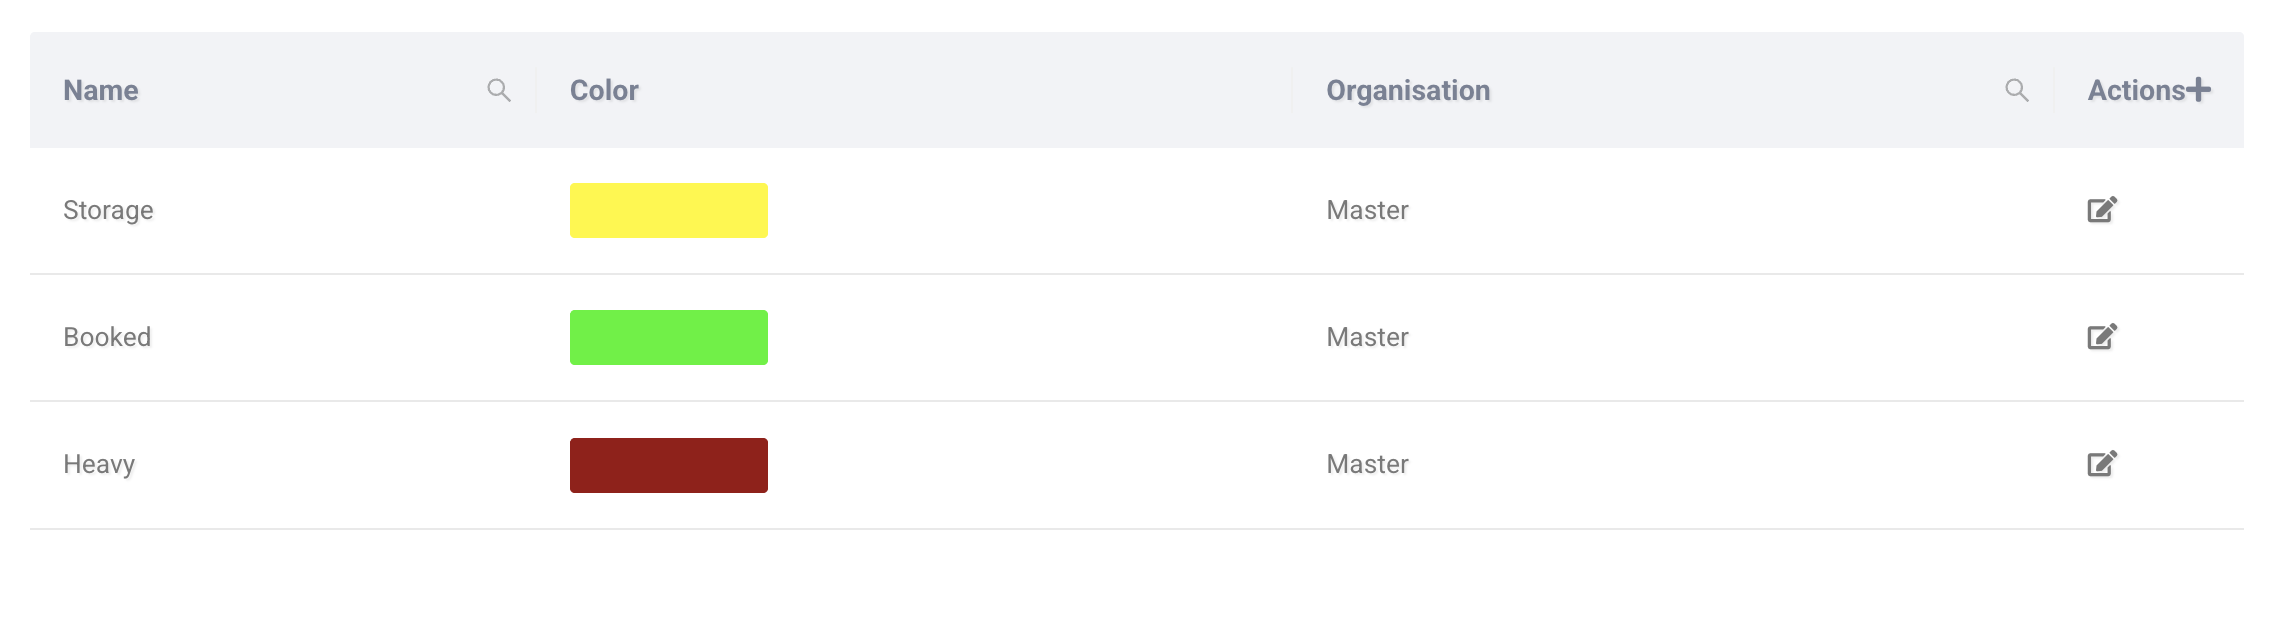
The table shows:
- Name – The tag label.
- Color – The colour used to display the tag.
- Organisation – The organisation the tag belongs to.
You can edit an existing tag using the edit icon.
Adding a Job Tag
Click Actions+ to create a new job tag.
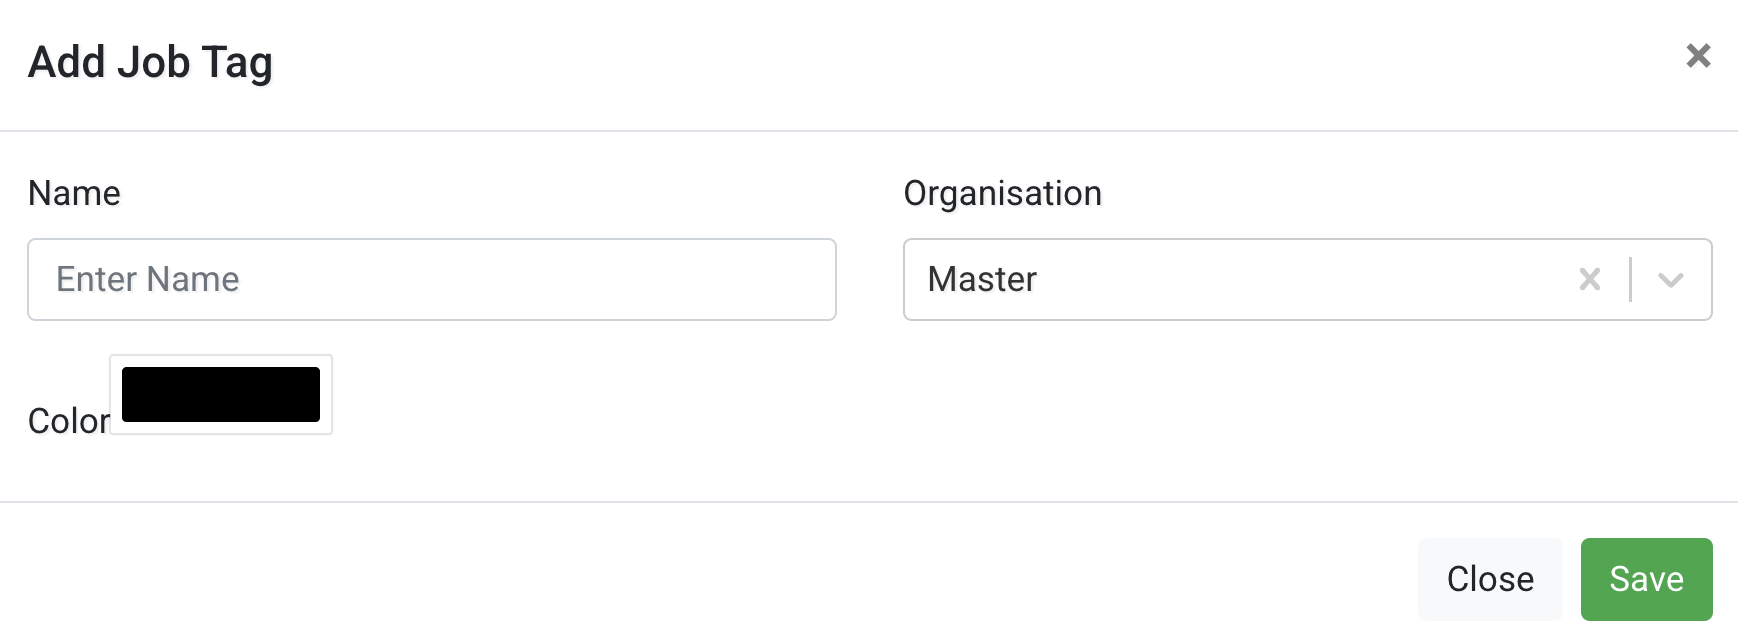
Configure the following fields:
- Name – The label that will appear on jobs.
- Organisation – Select which organisation the tag belongs to.
- Color – Choose a colour for visual identification.
After completing the fields, click Save.
Vehicle Categories
Use the Vehicle Categories tab to define vehicle types used in your organisation.
Vehicle Categories are useful when you operate multiple types of vehicles (for example, large trucks and vans), allowing you to categorise them clearly and keep track of your fleet structure.
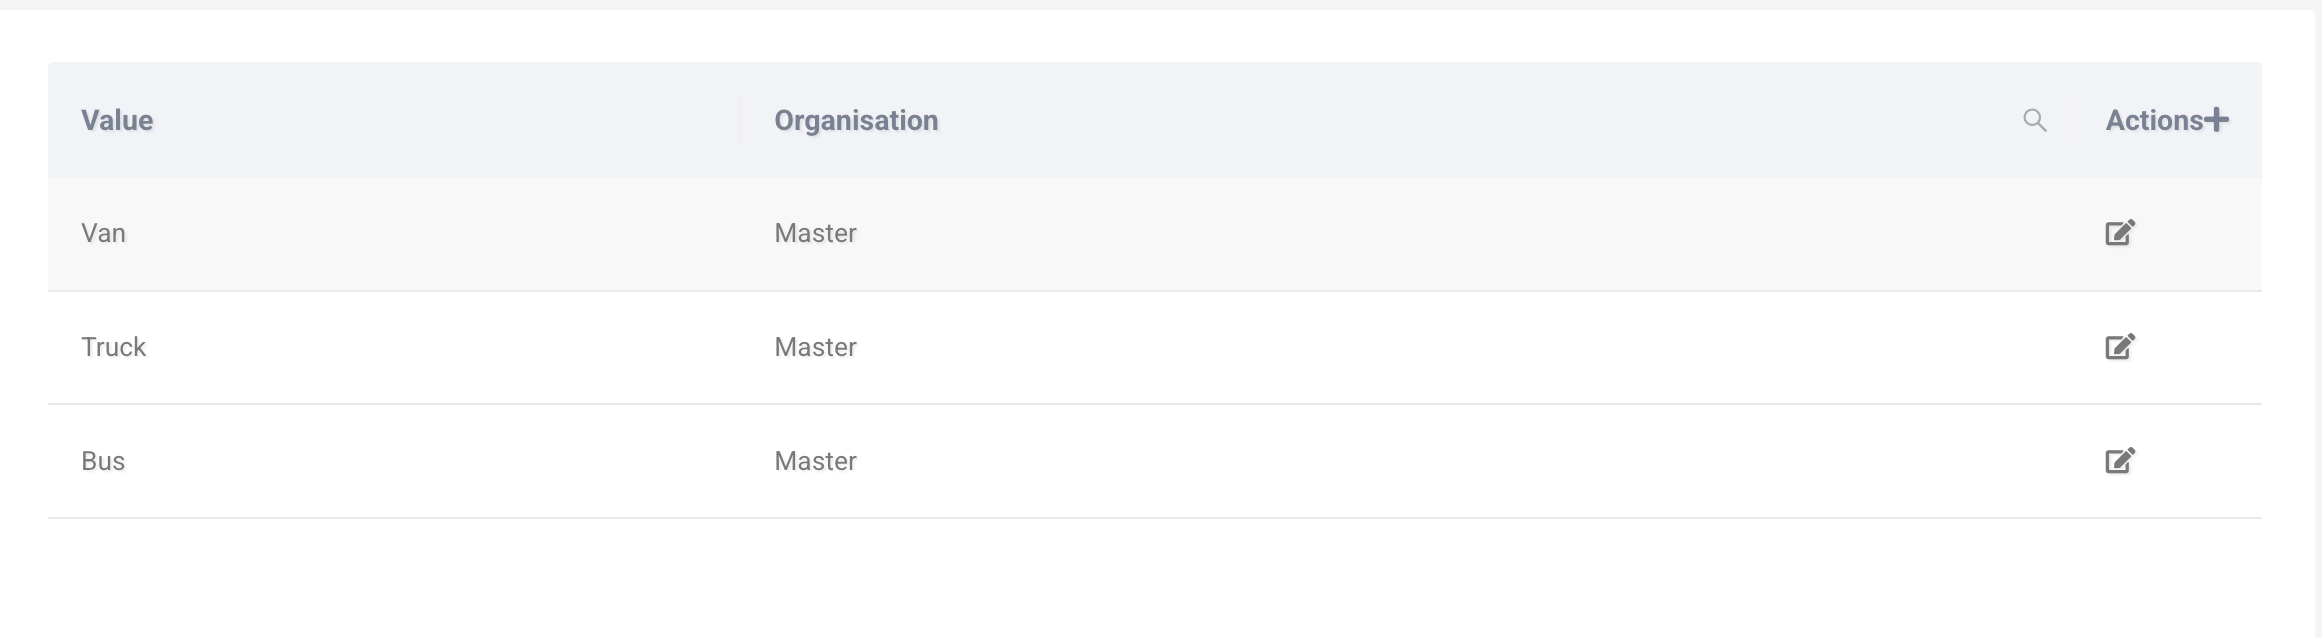
The table shows:
- Value – The name of the vehicle category.
- Organisation – The organisation the category belongs to.
You can edit an existing category using the edit icon.
Adding a Vehicle Category
Click Actions+ to create a new vehicle category.
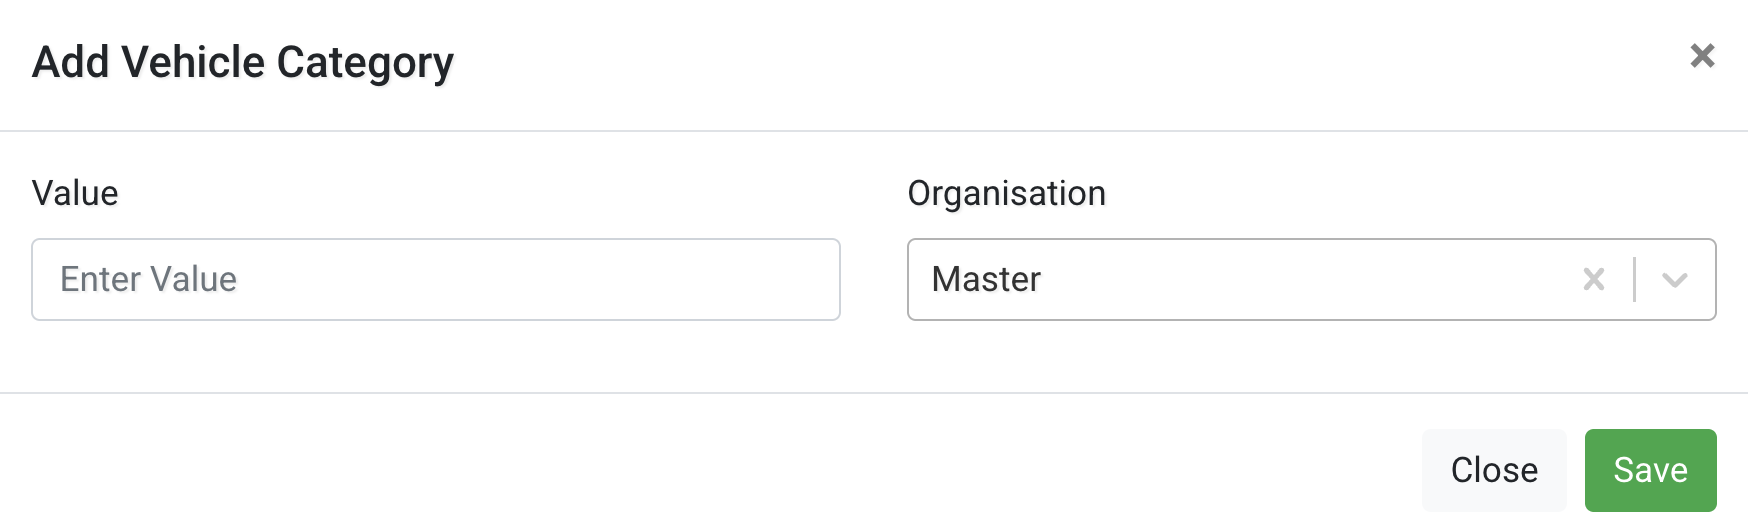
Configure the following fields:
- Value – The name of the vehicle category (e.g. Van, Truck, Bus).
- Organisation – Select which organisation the category belongs to.
After completing the fields, click Save.
Territories
Use the Territories tab to manage territories and territory groups.
Territories restrict which drivers can serve specific areas and allow you to structure planning geographically.
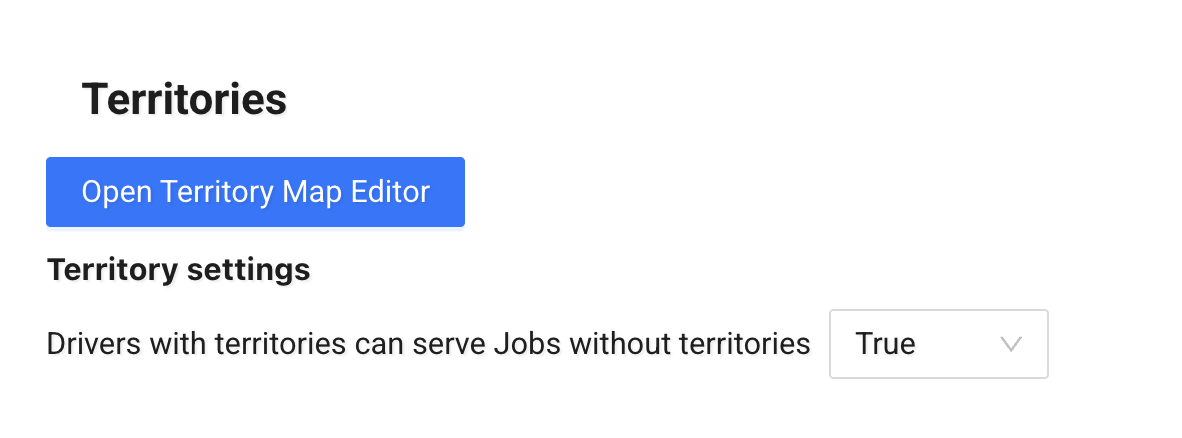
Open Territory Map Editor
Click Open Territory Map Editor to create or edit territories on the map.
This opens the Territory Builder — a separate feature where you can:
- draw territories using polylines
- define geographic areas
- assign territories or territory groups to scenarios
See How to use Territory Builder for detailed instructions.
Territory Settings
- Drivers with territories can serve jobs without territories
If set to True, drivers assigned to territories can also serve jobs that have no territory assigned.
If set to False, drivers will only be assigned to jobs within their defined territories.
Choose the option that matches your operational rules.
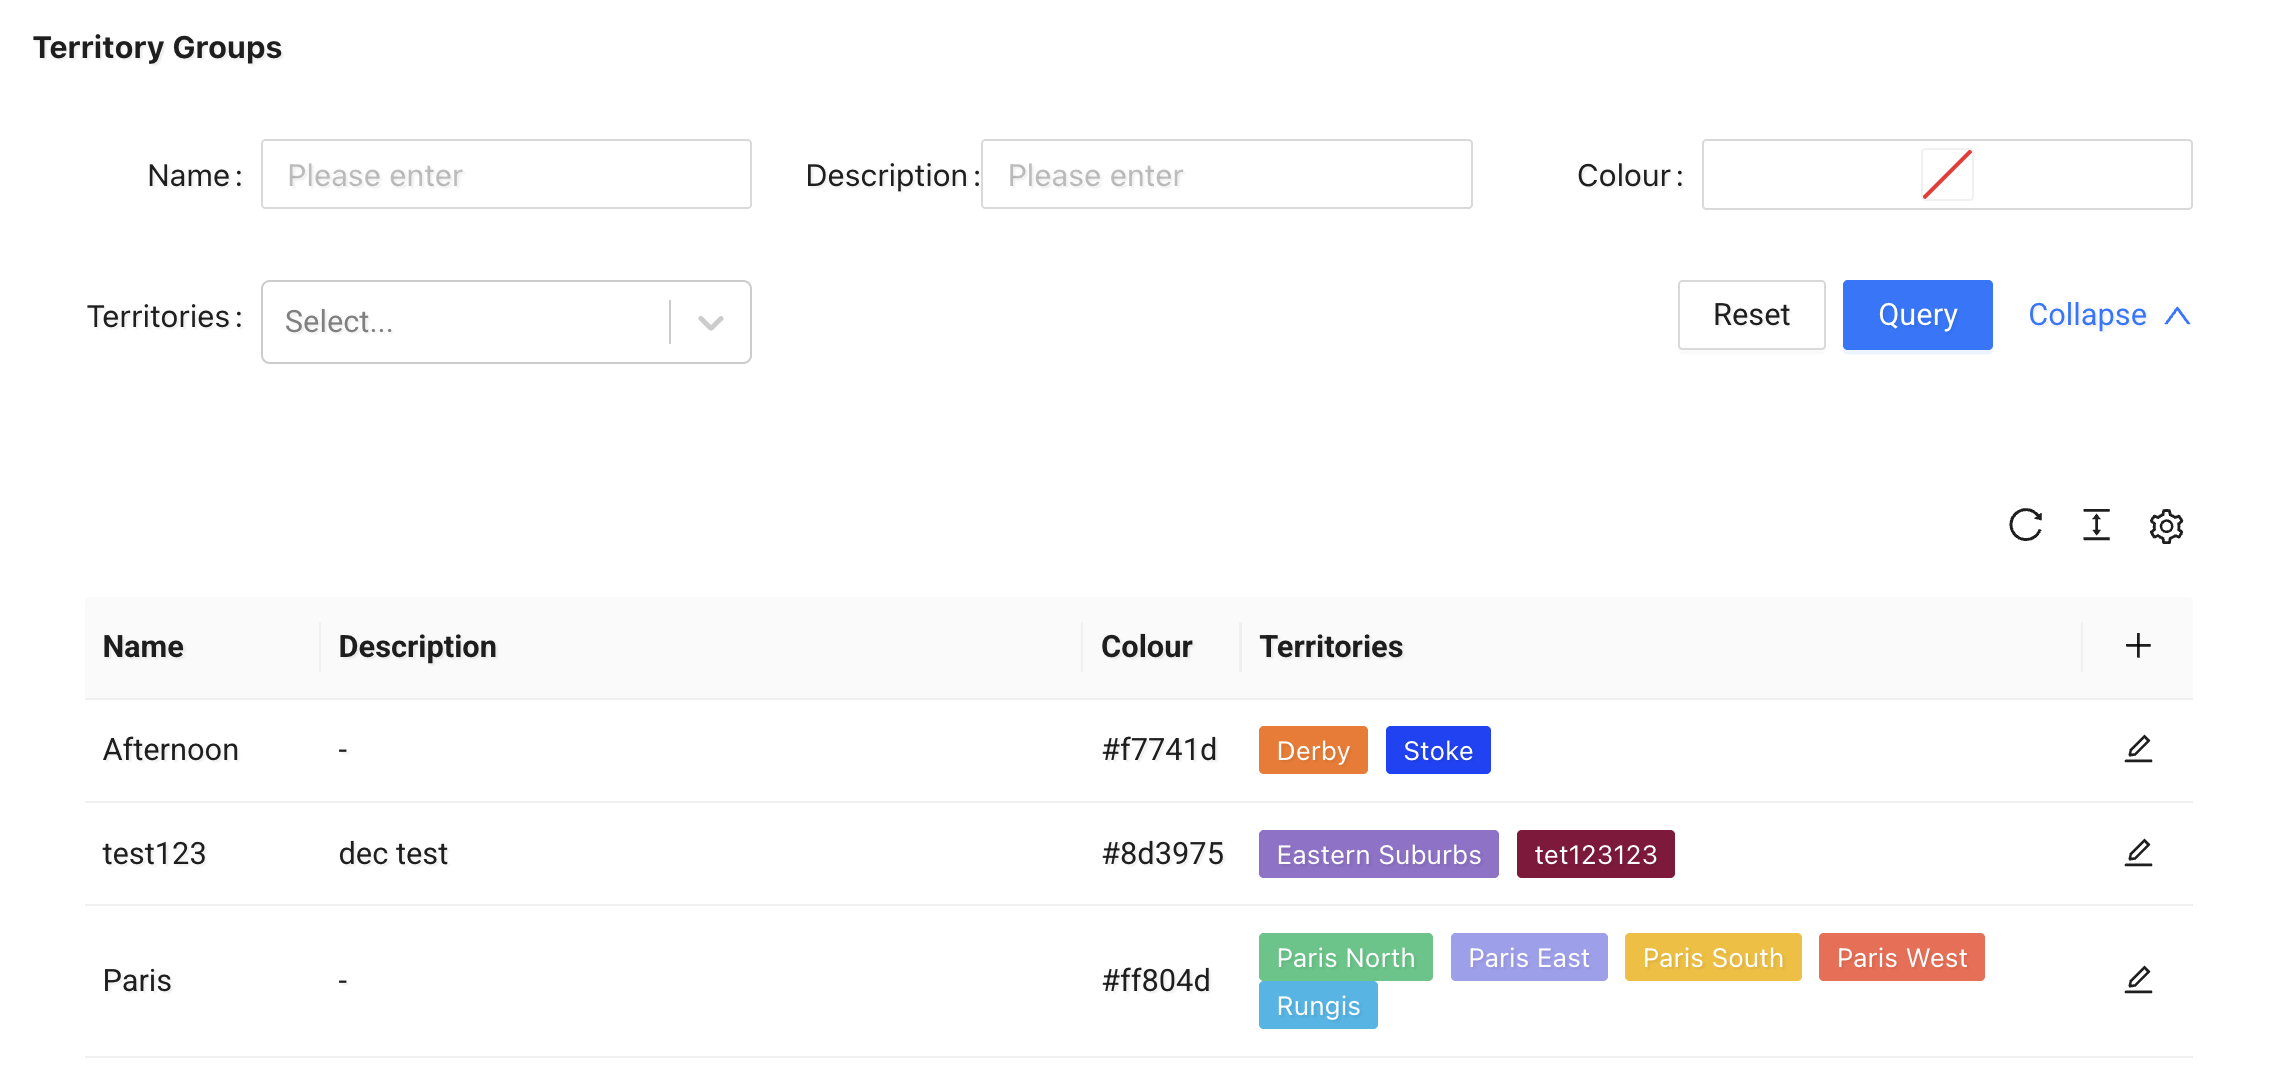
Territory Groups
Territory Groups allow you to manage multiple territories as a single logical group.
When you apply a Territory Group to a scenario, all territories within that group are applied to the scenario.
Each group includes:
- Name
- Description
- Colour
- Territories – One or more selected territories
You can create, edit, and manage territory groups from this section.
Territories
The Territories section lists all defined territories.

Each territory includes:
- Name
- Description
- Color
- IDM Job Limit (if configured)
From here, you can: - filter territories - edit existing ones - delete territories
Territories are created and shaped in the Territory Builder and then managed here in the Admin Panel.
Delivery & Tracking
The Delivery & Tracking page allows you to configure how your public tracking pages and delivery interactions behave.
It includes four tabs:
- Delivery Tracking
- Proof of Delivery
- Reschedule Notification Settings
- Dispatch Settings
Delivery Tracking
![]()
Interactive Delivery Management
Configure how customers can manage their delivery:
- Delivery reschedule cut off – Defines how long before the scheduled date rescheduling is allowed.
- Logo – Upload your company logo to display on delivery tracking pages.
This section controls customer-facing delivery interaction.
Page Customisation
![]()
You can control which fields are visible on the tracking page.
Each row allows you to:
- Enable or disable a field
- Rename the display text shown to customers
General
Controls global tracking page elements:
- Powered by label
- Add Delivery button
Job Details
Control which job information is displayed:
- ETA (planned and updated)
- Signature time
- Accept / Reschedule / Schedule buttons
- Delivery instructions
- Address
- Job UID
- Tracking ID
- Sender
- Delivered by
- Attachments and Proof buttons
Delivery Milestones
Control which status milestones are visible:
- Created
- Planned
- Started
- Delivered
- Custom status messages
Delivery Scheduling Modal
Customize the rescheduling interface:
- Delivery Scheduling title
- Option labels
- Comment field
- Reschedule button
- Schedule Delivery button
This allows you to tailor the tracking experience to match your branding and workflow.
Proof of Delivery
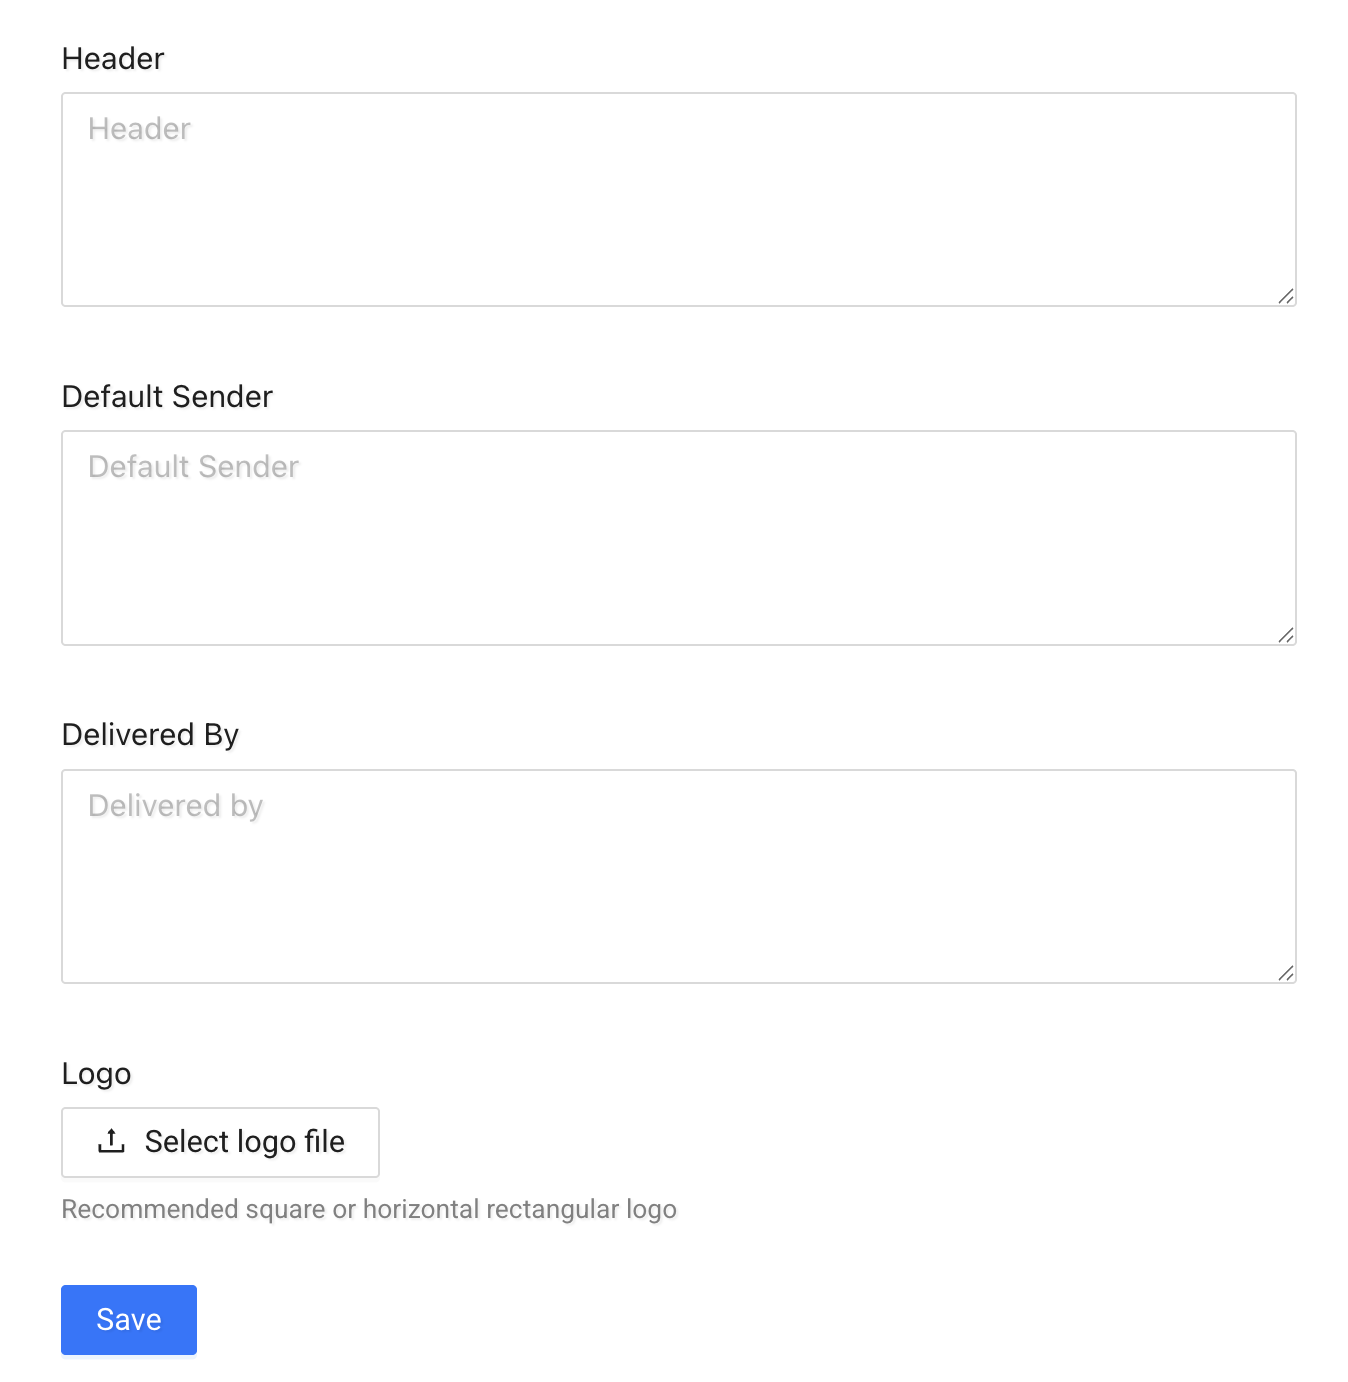
Configure how Proof of Delivery (PoD) documents are presented.
You can define:
- Header text
- Default sender
- Delivered by text
- Logo
These settings affect how PoD documents appear when viewed or downloaded.
Reschedule Notification Settings
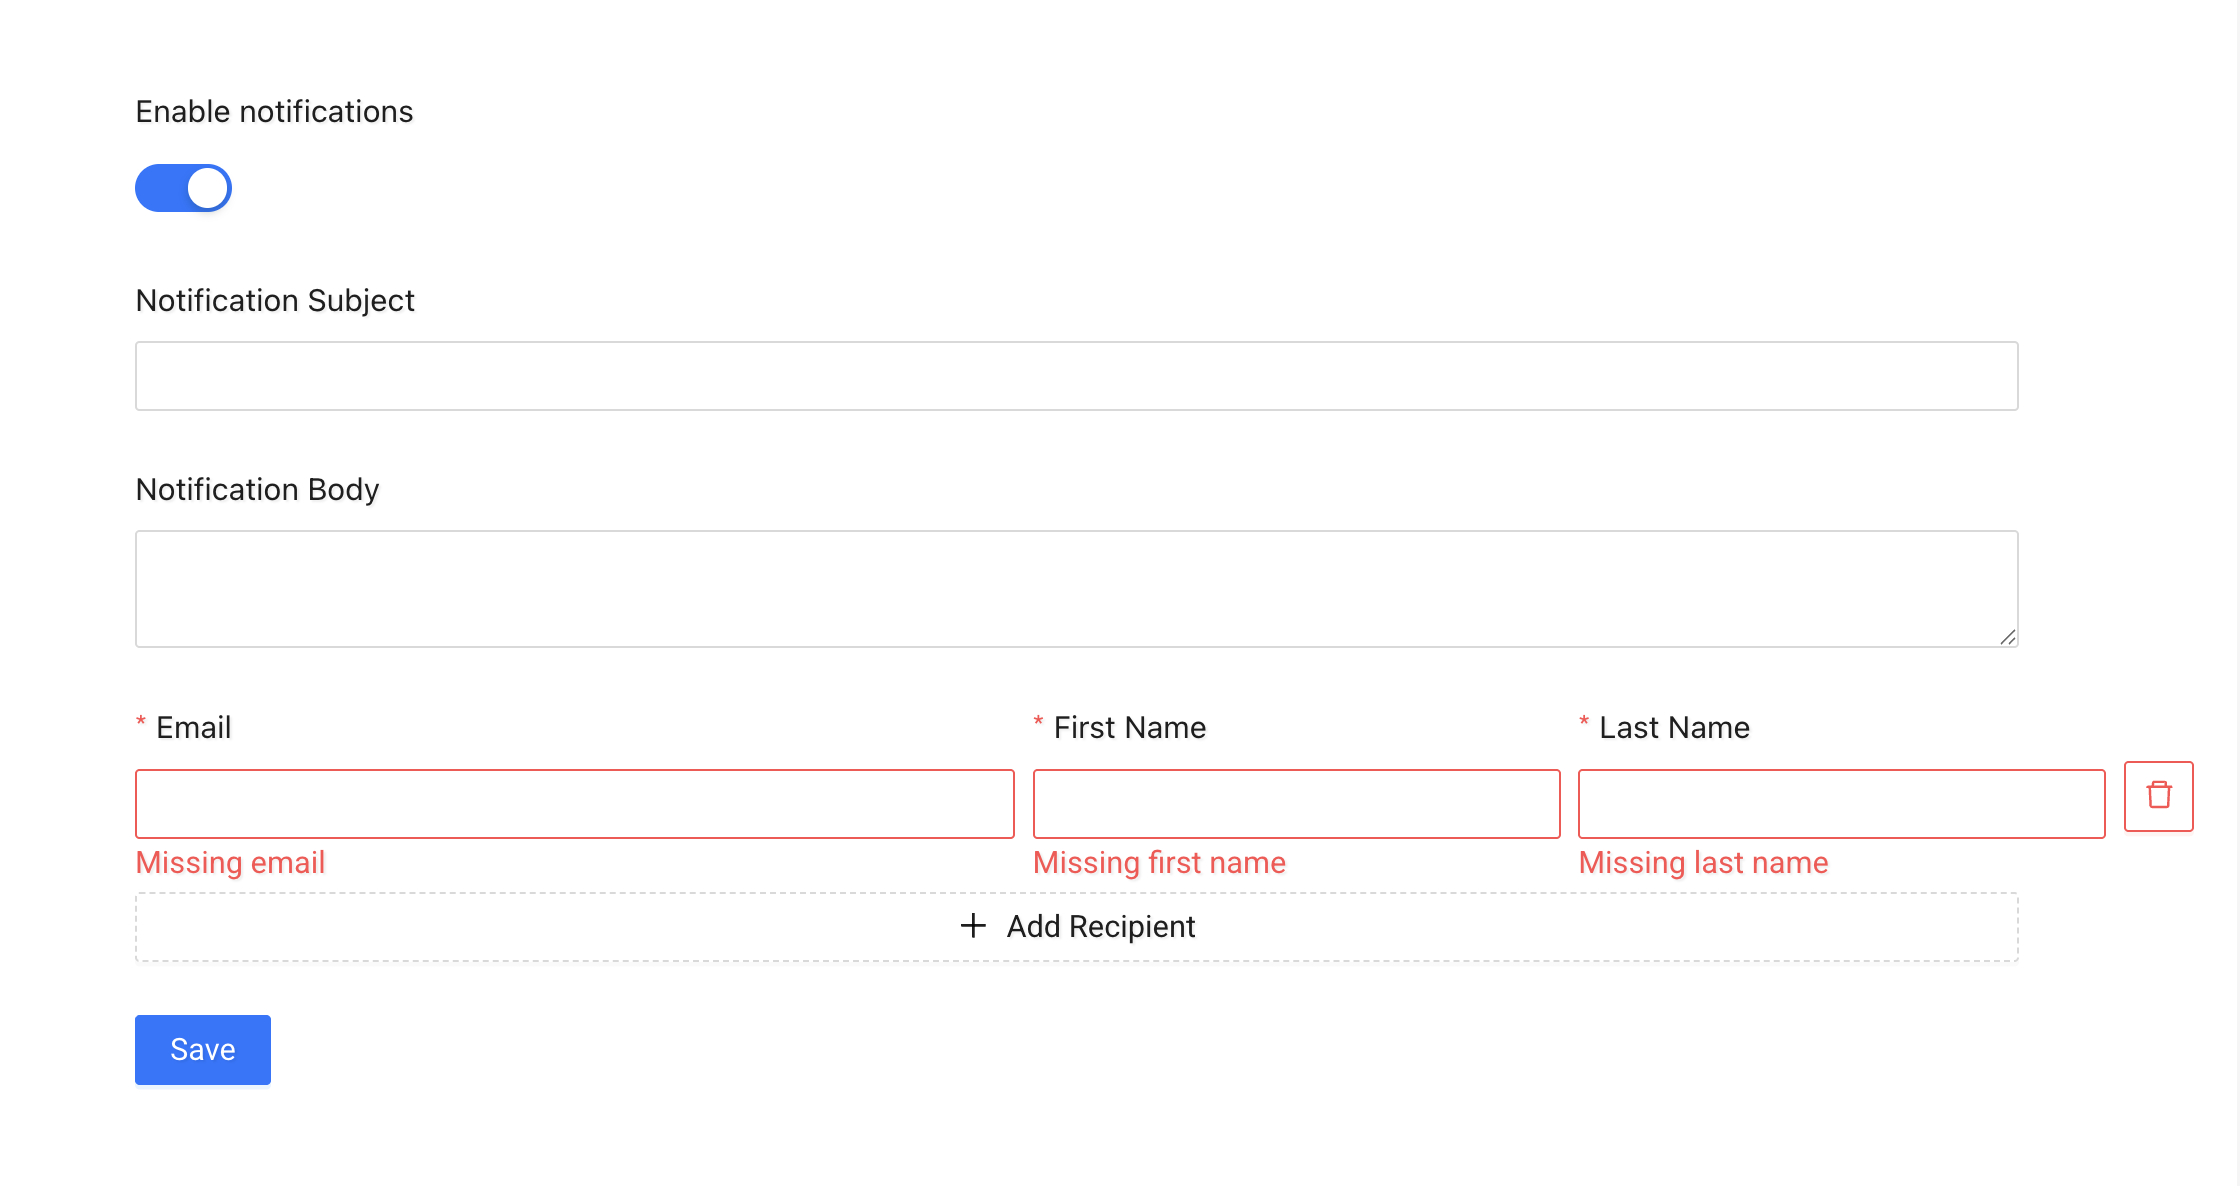
Configure email notifications sent when a delivery is rescheduled.
You can:
- Enable or disable notifications
- Set the notification subject
- Define the notification body
- Add one or more recipients
Dispatch Settings
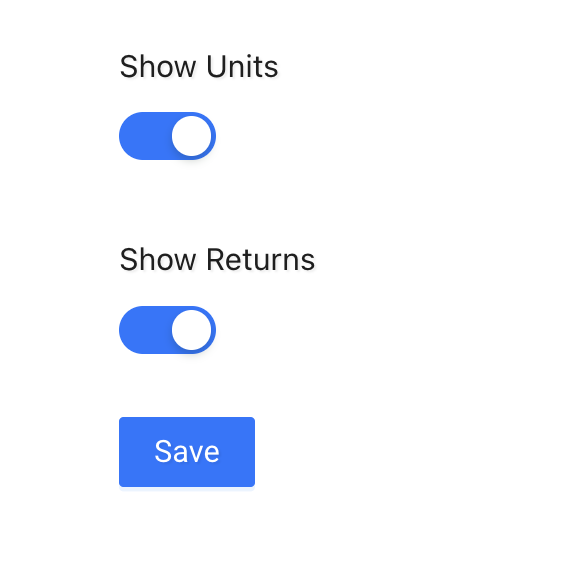
Control visibility of additional job data:
- Show Units
- Show Returns
Scenario Templates
Use Scenario Templates to create reusable scenario configurations.
Templates allow you to predefine drivers, territory groups, and default dates — so you don’t need to configure them manually each time.
What is a Scenario Template?
A Scenario Template is a predefined setup that can include:
- A scenario name
- A tracking name (customer-facing)
- Assigned drivers
- Assigned territory groups
- A default date
This helps standardize recurring planning scenarios.
Create a Scenario Template
Click the + button to create a new template.
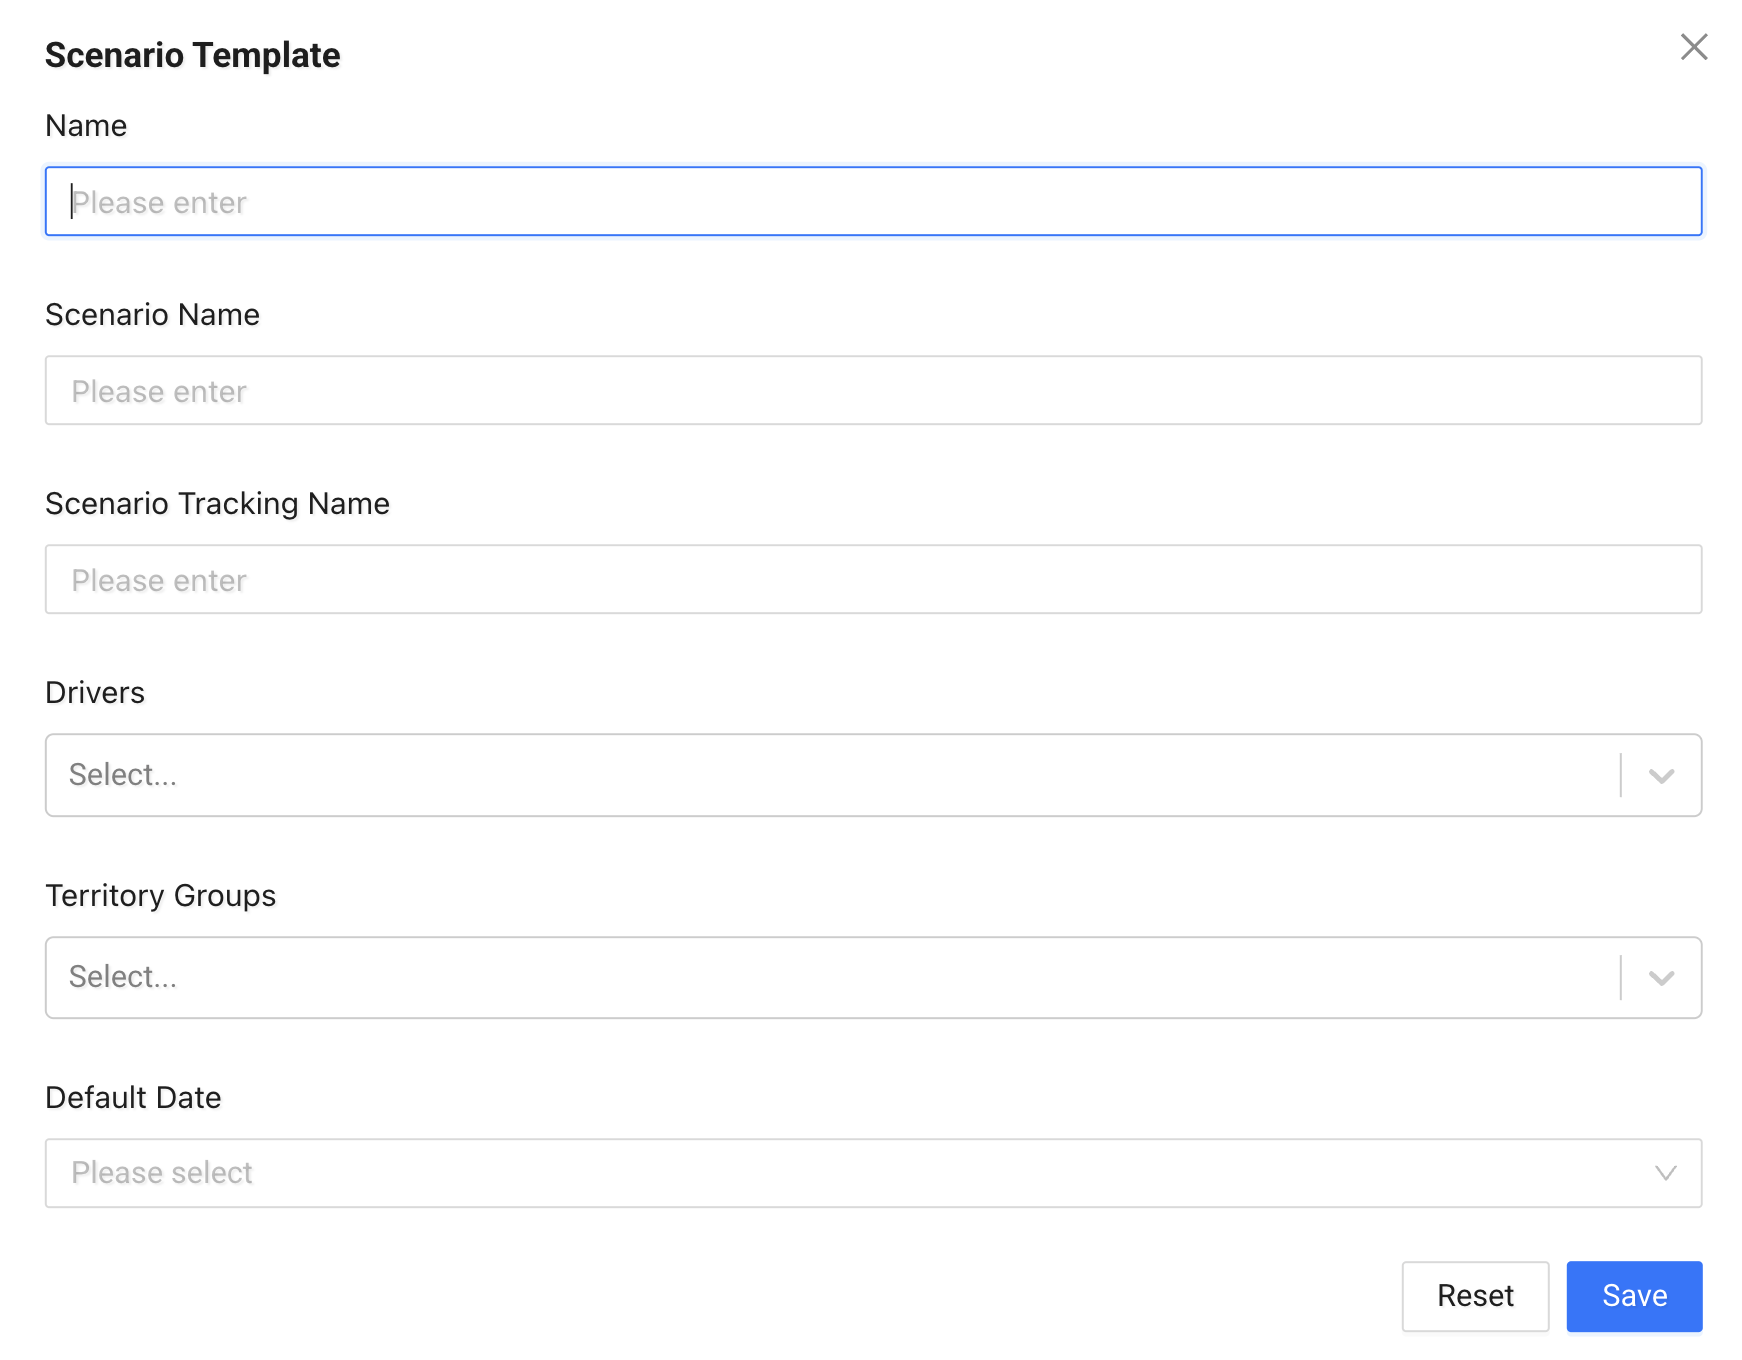
Fill in the following fields:
- Name – Internal name of the template
- Scenario Name – The scenario name used in planning
- Scenario Tracking Name – The name shown in tracking pages
- Drivers – Select one or more drivers
- Territory Groups – Assign relevant territory groups
- Default Date – Set a default scheduling date (e.g. Tomorrow, Next Business Day)
Click Save to create the template.
Managing Templates
From the list view, you can:
- View assigned drivers and territory groups
- See the default date
- Edit existing templates
Note
Scenario Templates do not run automatically. They provide a predefined configuration that can be used when creating or planning scenarios.
Delivery Checklist
Delivery Checklists allow you to configure mandatory checks that drivers must complete in the mobile app.
There are two checklist types:
- Start Route – completed before a driver begins a route
- End Route – completed after a driver finishes a route
These checklists appear in the mobile application as part of Start Run Proofs and End Run Proofs.
Once completed, checklist data is stored with the run proofs and can be viewed in the Tracking Panel.
To access it: Right-click a completed run → open Run Details → go to the Proofs tab.
See also: Driver Mobile App Quickstart
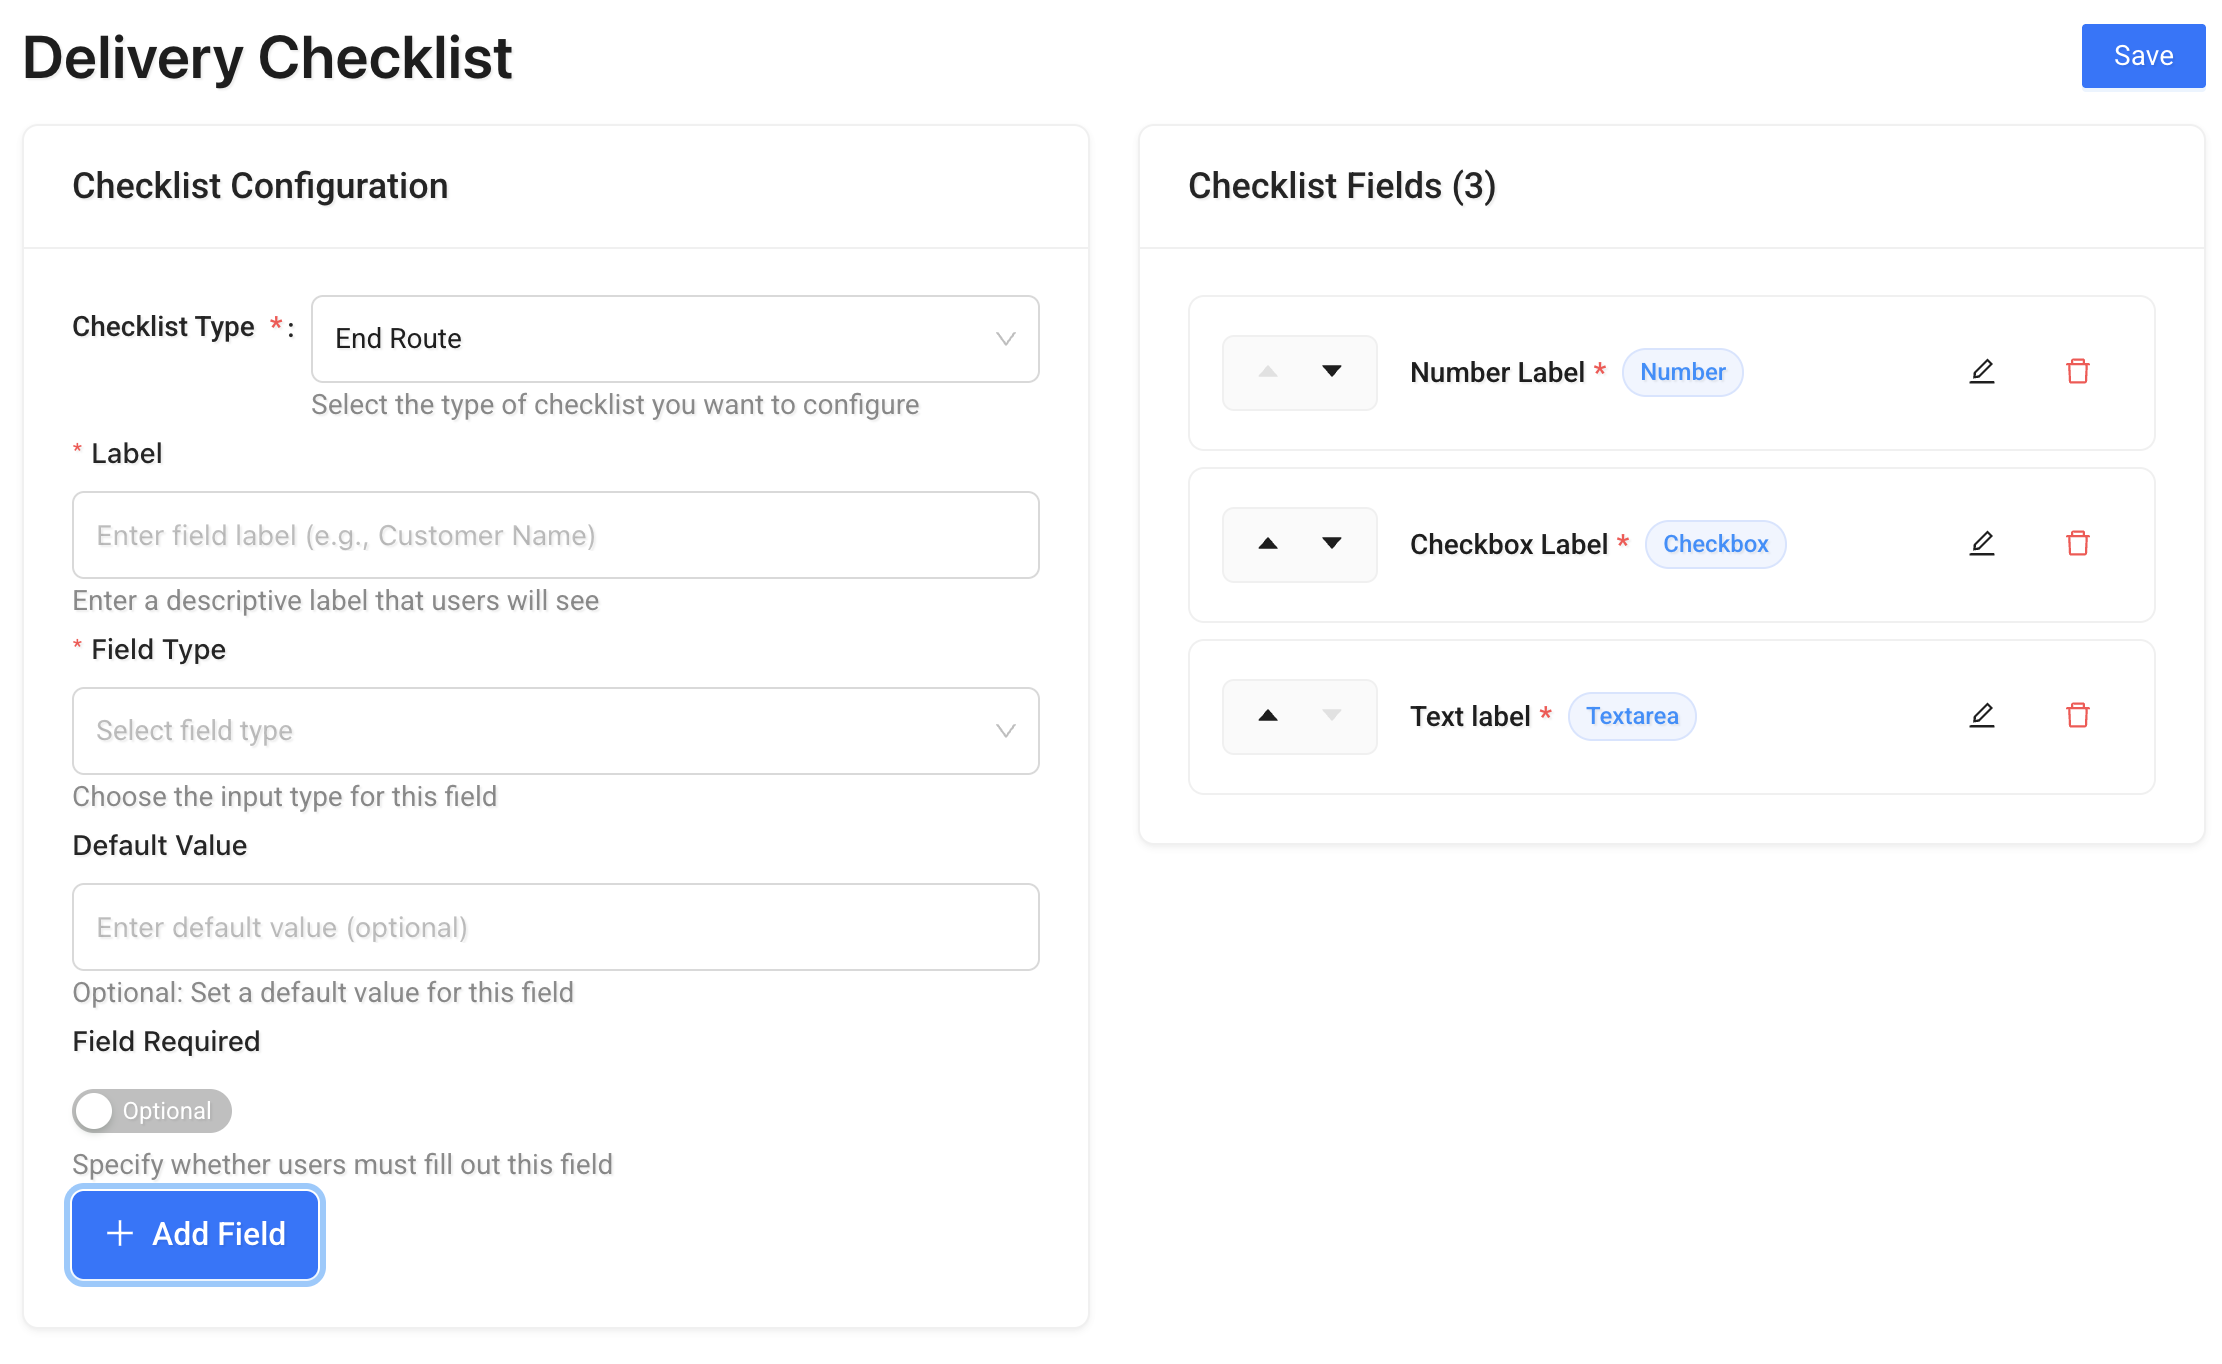
Checklist Configuration
Select the Checklist Type:
- Start Route
- End Route
Each checklist type can have its own custom fields.
Adding Custom Fields
You can build fully custom forms by adding fields of different types.
Supported field types include:
- Text
- Number
- Textarea
- Select
- Checkbox
- Date
- Time
- Images
- Signature
- Todo
Click Add Field to create a new field.
Field Settings
For each field you can configure:
- Label – The name shown to drivers
- Field Type – The input type
- Default Value – Optional pre-filled value
- Field Required – Make the field mandatory
- Field Constraints – Set validation rules (e.g. minimum and maximum length for text/number fields)
You can also reorder fields using the arrow controls in the field list.
How It Works in the Mobile App
When a checklist is configured:
- Drivers must complete all required fields before starting or ending a route
- Validation rules are enforced
- Submitted checklist data is saved with the run
This ensures operational compliance, safety checks, and structured data collection directly from the field.
SMS Configuration
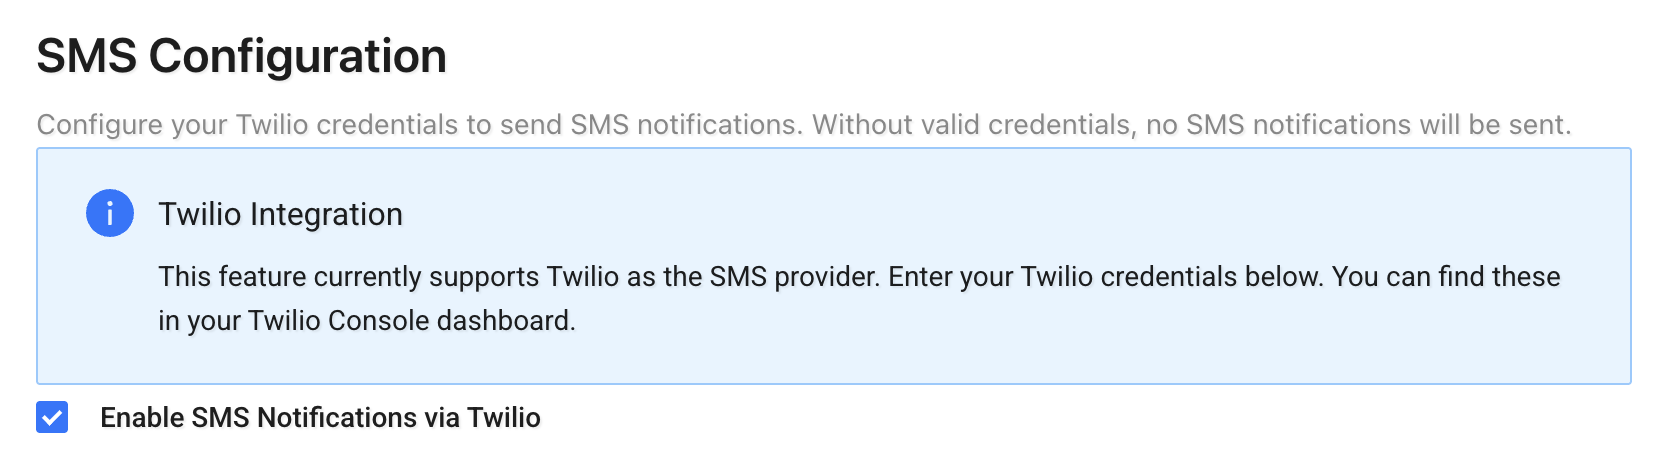
The SMS Configuration page allows you to enable and configure SMS notifications using Twilio.
This integration is required if you want the system to send SMS updates (such as reschedule notifications or tracking updates).
SMS notifications are typically configured and triggered through Events & Actions.
See also: Events & Actions
Twilio Integration
To send SMS notifications, you must:
- Enable SMS Notifications via Twilio
- Enter valid Twilio credentials
Required fields:
- Twilio Account SID
- Twilio API Key
- Twilio API Secret
- Twilio Sender Number (must include country code, e.g. +1234567890)
You can find these credentials in your Twilio Console under: Account → API Keys & Tokens → Account Info
How It Works
Once configured:
- SMS notifications will be sent using your Twilio account
- The sender number will be used for all outbound messages
- If credentials are invalid or missing, SMS notifications will not be delivered
Click Save Configuration after entering your credentials.
Important Notes
- The sender number must be purchased or verified in your Twilio account.
- Ensure your Twilio account has sufficient balance.
- SMS costs are billed directly by Twilio.
Events & Actions
Use the Events & Actions section to automatically send notifications when something happens in Tarot.
For example, you can send an email or SMS when:
- a job is created
- a job is completed
- a run starts or finishes
This helps you keep your team and customers informed without manual work.
Events & Actions Builder
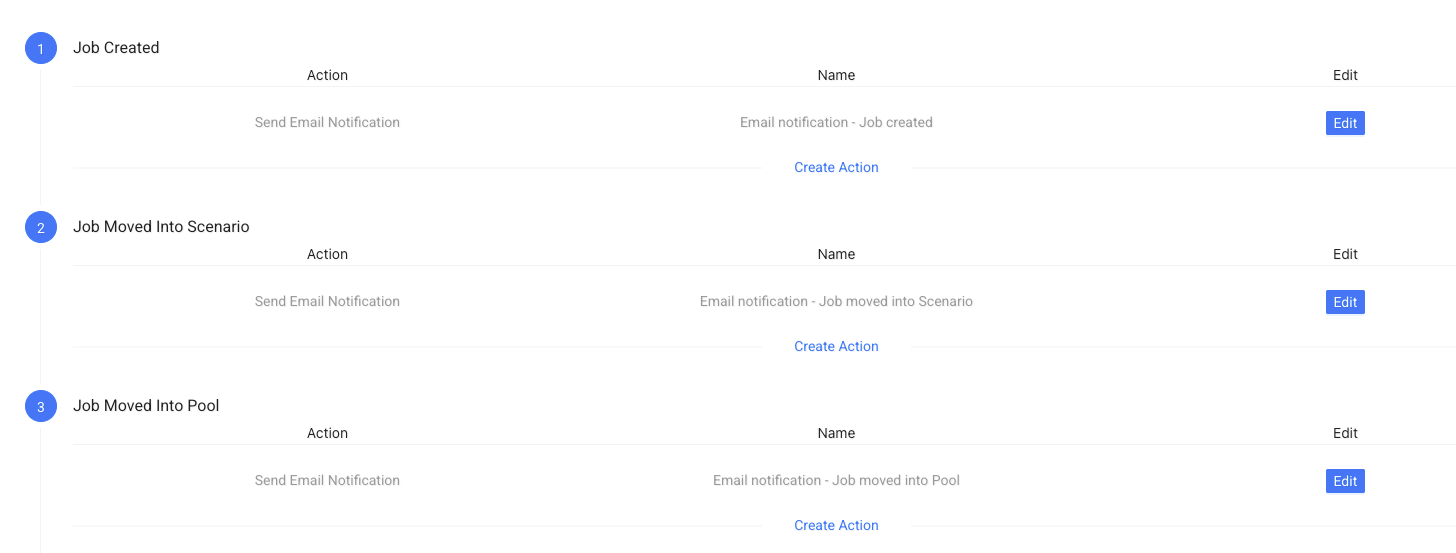
On this page, you see a list of events.
Each event is something that can happen in Tarot.
You can attach actions (notifications) to any event.
Events
Events define when a notification should be sent.
Common examples:
- Job Created – when you add a new job
- Job Moved Into Scenario – when you assign a job to a scenario
- Job Moved Into Pool – when a job is moved back to the job pool
- Job Completed – when a job is finished
- Run Created – when a new run is created
- Run Started – when a driver starts a run
- Run Completed – when a run is finished
Actions
Actions define what happens when the event occurs.
You can choose:
- Send Email Notification
- Send SMS Notification
You can add multiple actions to the same event if needed.
Add an Action
Click Create Action under the event you want to use.
Then configure your notification.
Configure an Action
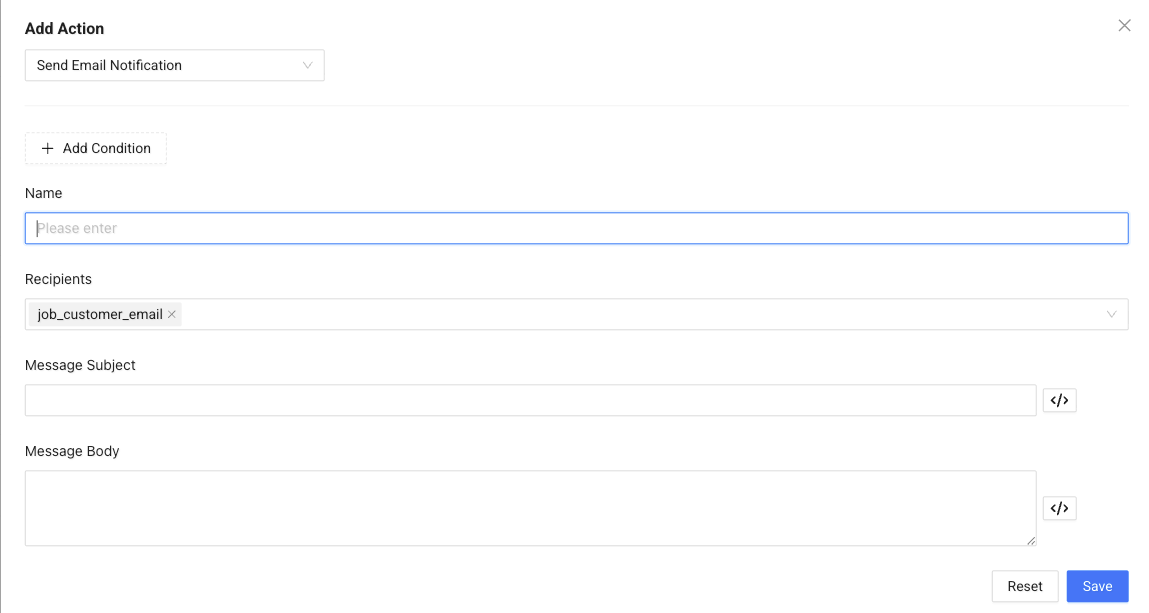
When creating an action, you define:
- Action type – Email or SMS
- Name – Internal name for this notification
- Recipients – Who should receive it (for example, customer email)
- Message Subject – The subject line (email only)
- Message Body – The content of the message
This lets you fully control what is sent and who receives it.
Conditions (Optional)

Add conditions if you only want the notification to be sent in specific cases.
For example, you can send a notification only:
- for a specific customer
- for certain job types
- when a field contains a specific value
You can choose fields like:
- Client UID
- Customer email
- Job priority
- and more
Then define how they should match (equals, contains, etc.).
How It Works
- An event happens (for example, a job is completed)
- Tarot checks your conditions (if you added any)
- The notification is sent automatically
This helps you automate communication and avoid manual updates.
Note
SMS notifications require SMS Configuration to be set up.
See SMS Configuration for more details.